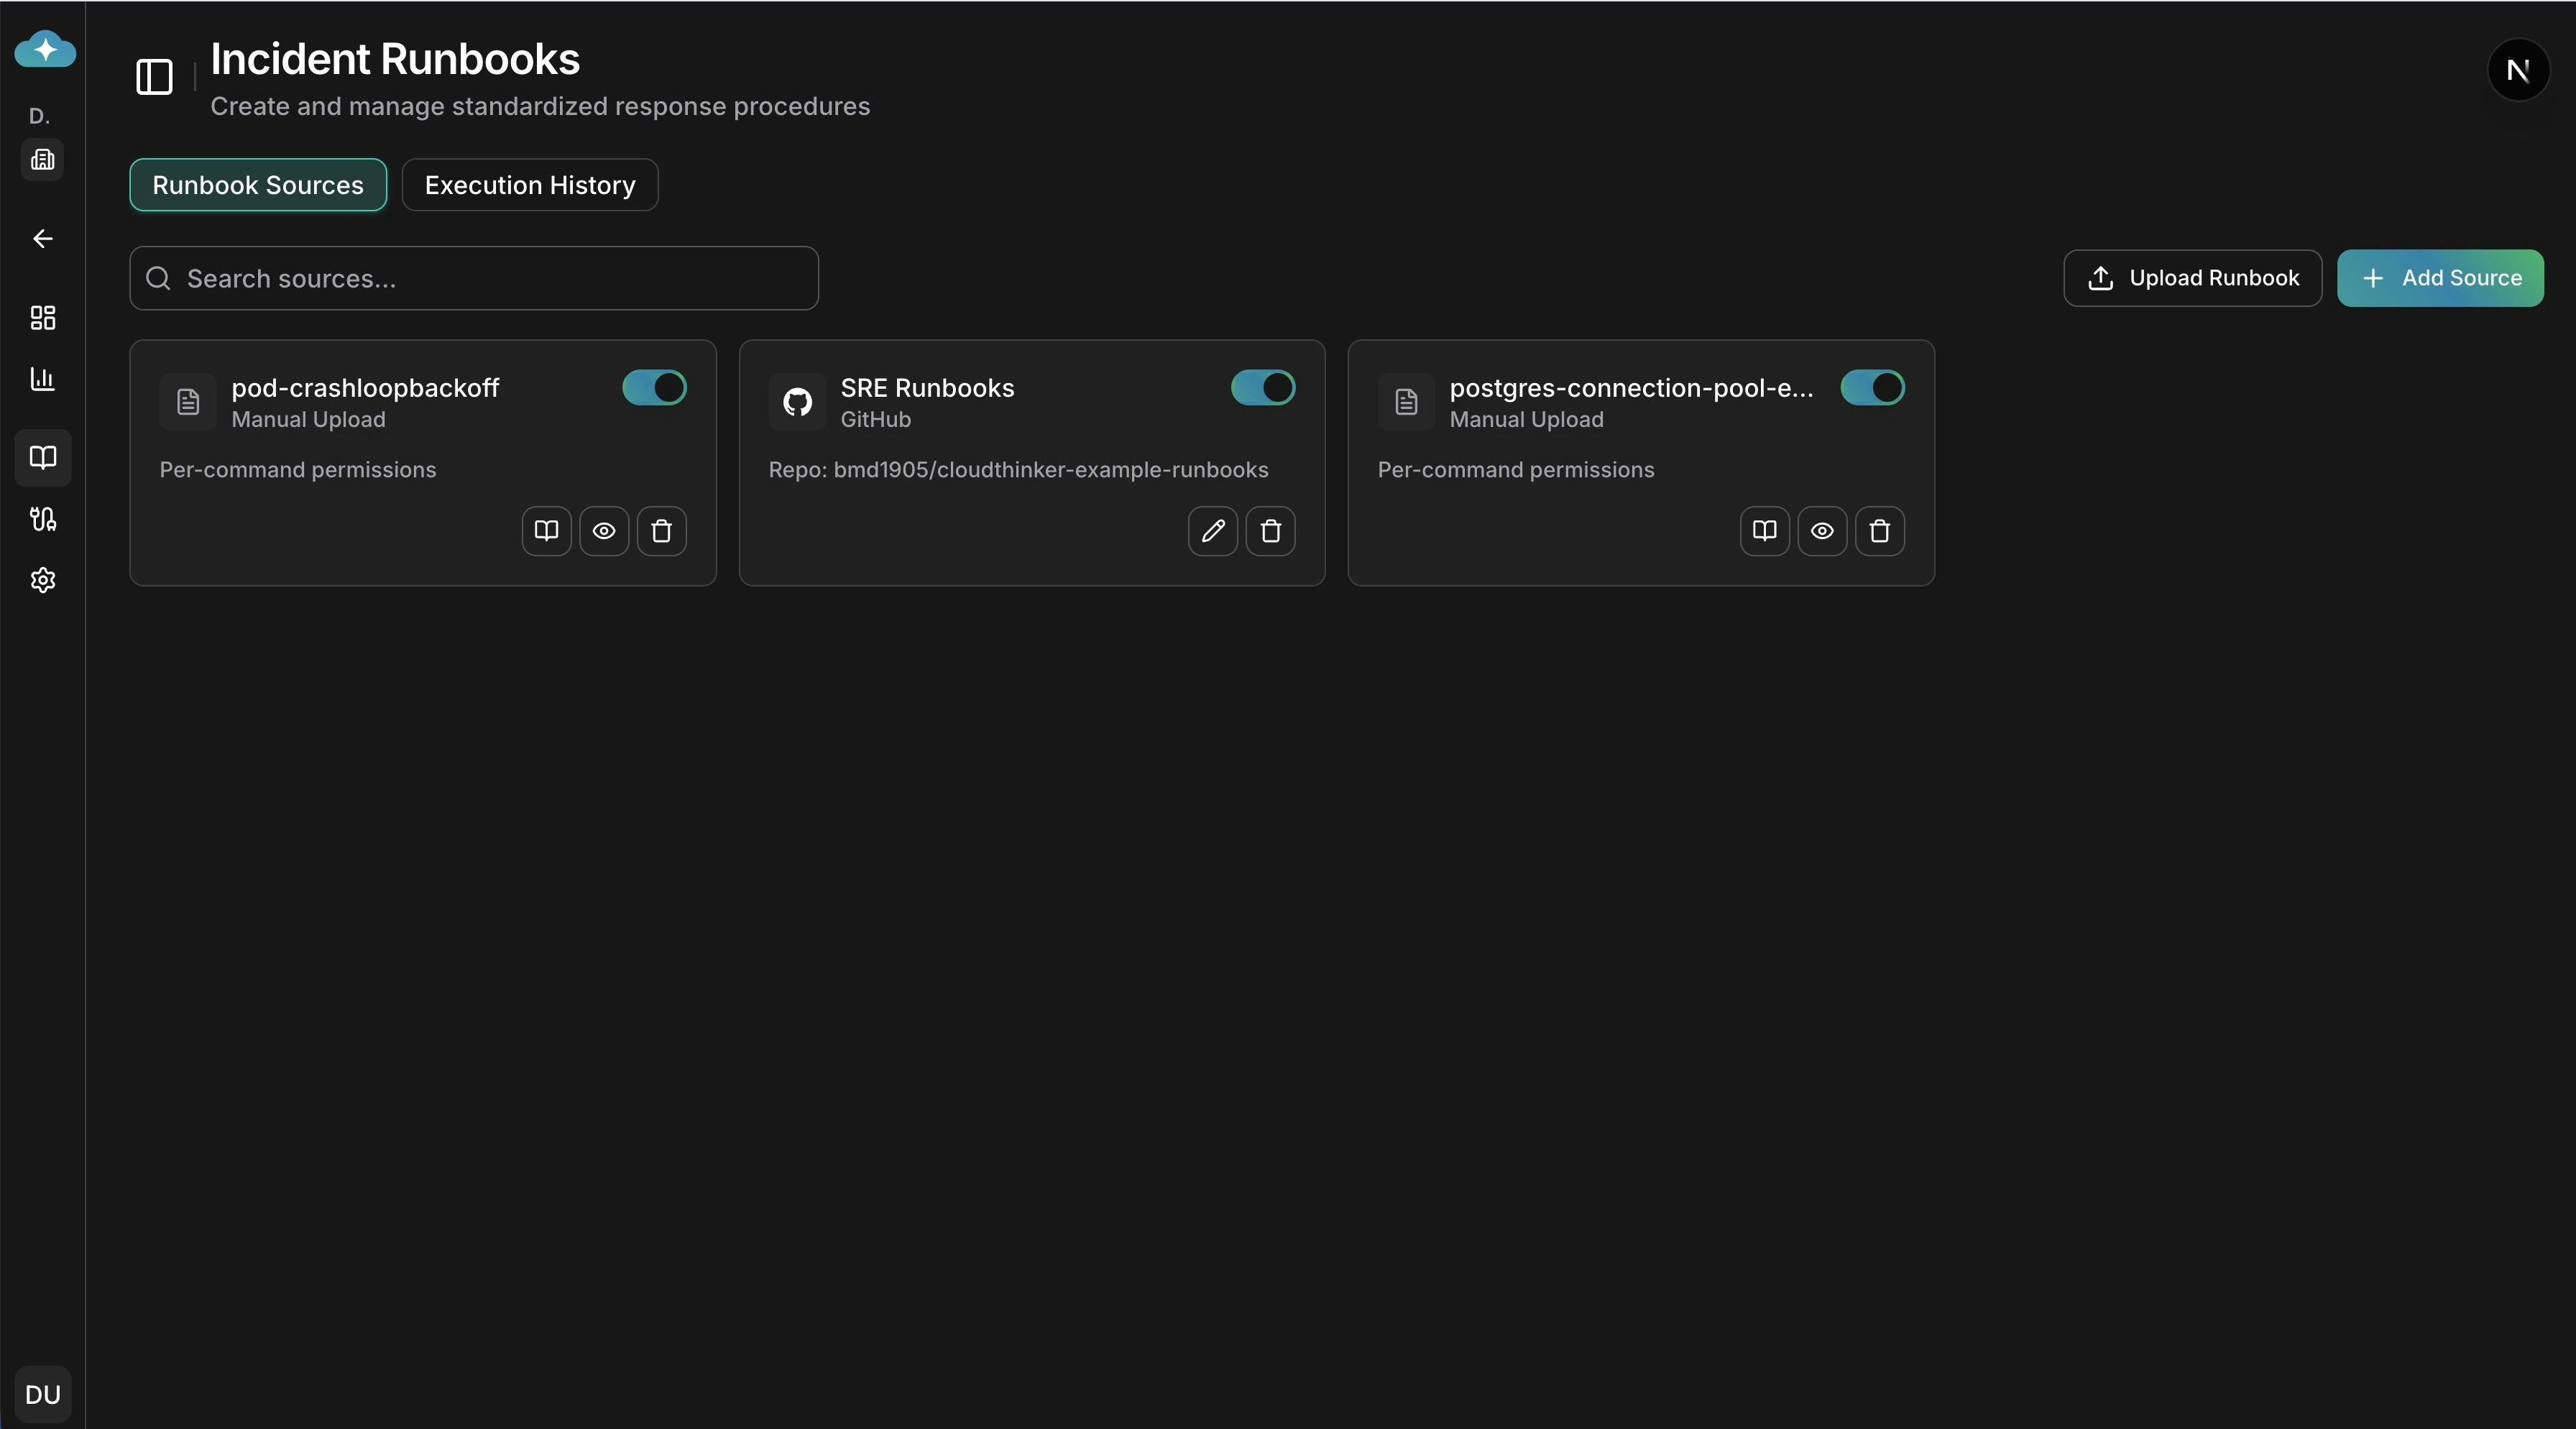
Runbook Sources dashboard with manual uploads and connected repositories
How runbooks work
1
Connect Your Sources
Link your existing runbook repositories—Confluence, GitHub, GitLab—or upload markdown files directly.
2
Agent Searches During RCA
When an incident triggers Root Cause Analysis, the AI agent searches your connected sources for relevant runbooks based on the incident context and affected services.
3
Policy Evaluation
Before executing any commands, the system evaluates your workspace approval policies. Depending on the policy, commands are either auto-executed, queued for approval, or blocked.
4
Execution with Approval
For commands requiring approval, you receive notifications via email, Slack, and in-app. Approve or reject directly from any channel. Approved commands execute immediately.
Connecting runbook sources
Navigate to Deep Response Engine > Runbooks to manage your sources. CloudThinker supports four source types, each suited to different workflows.
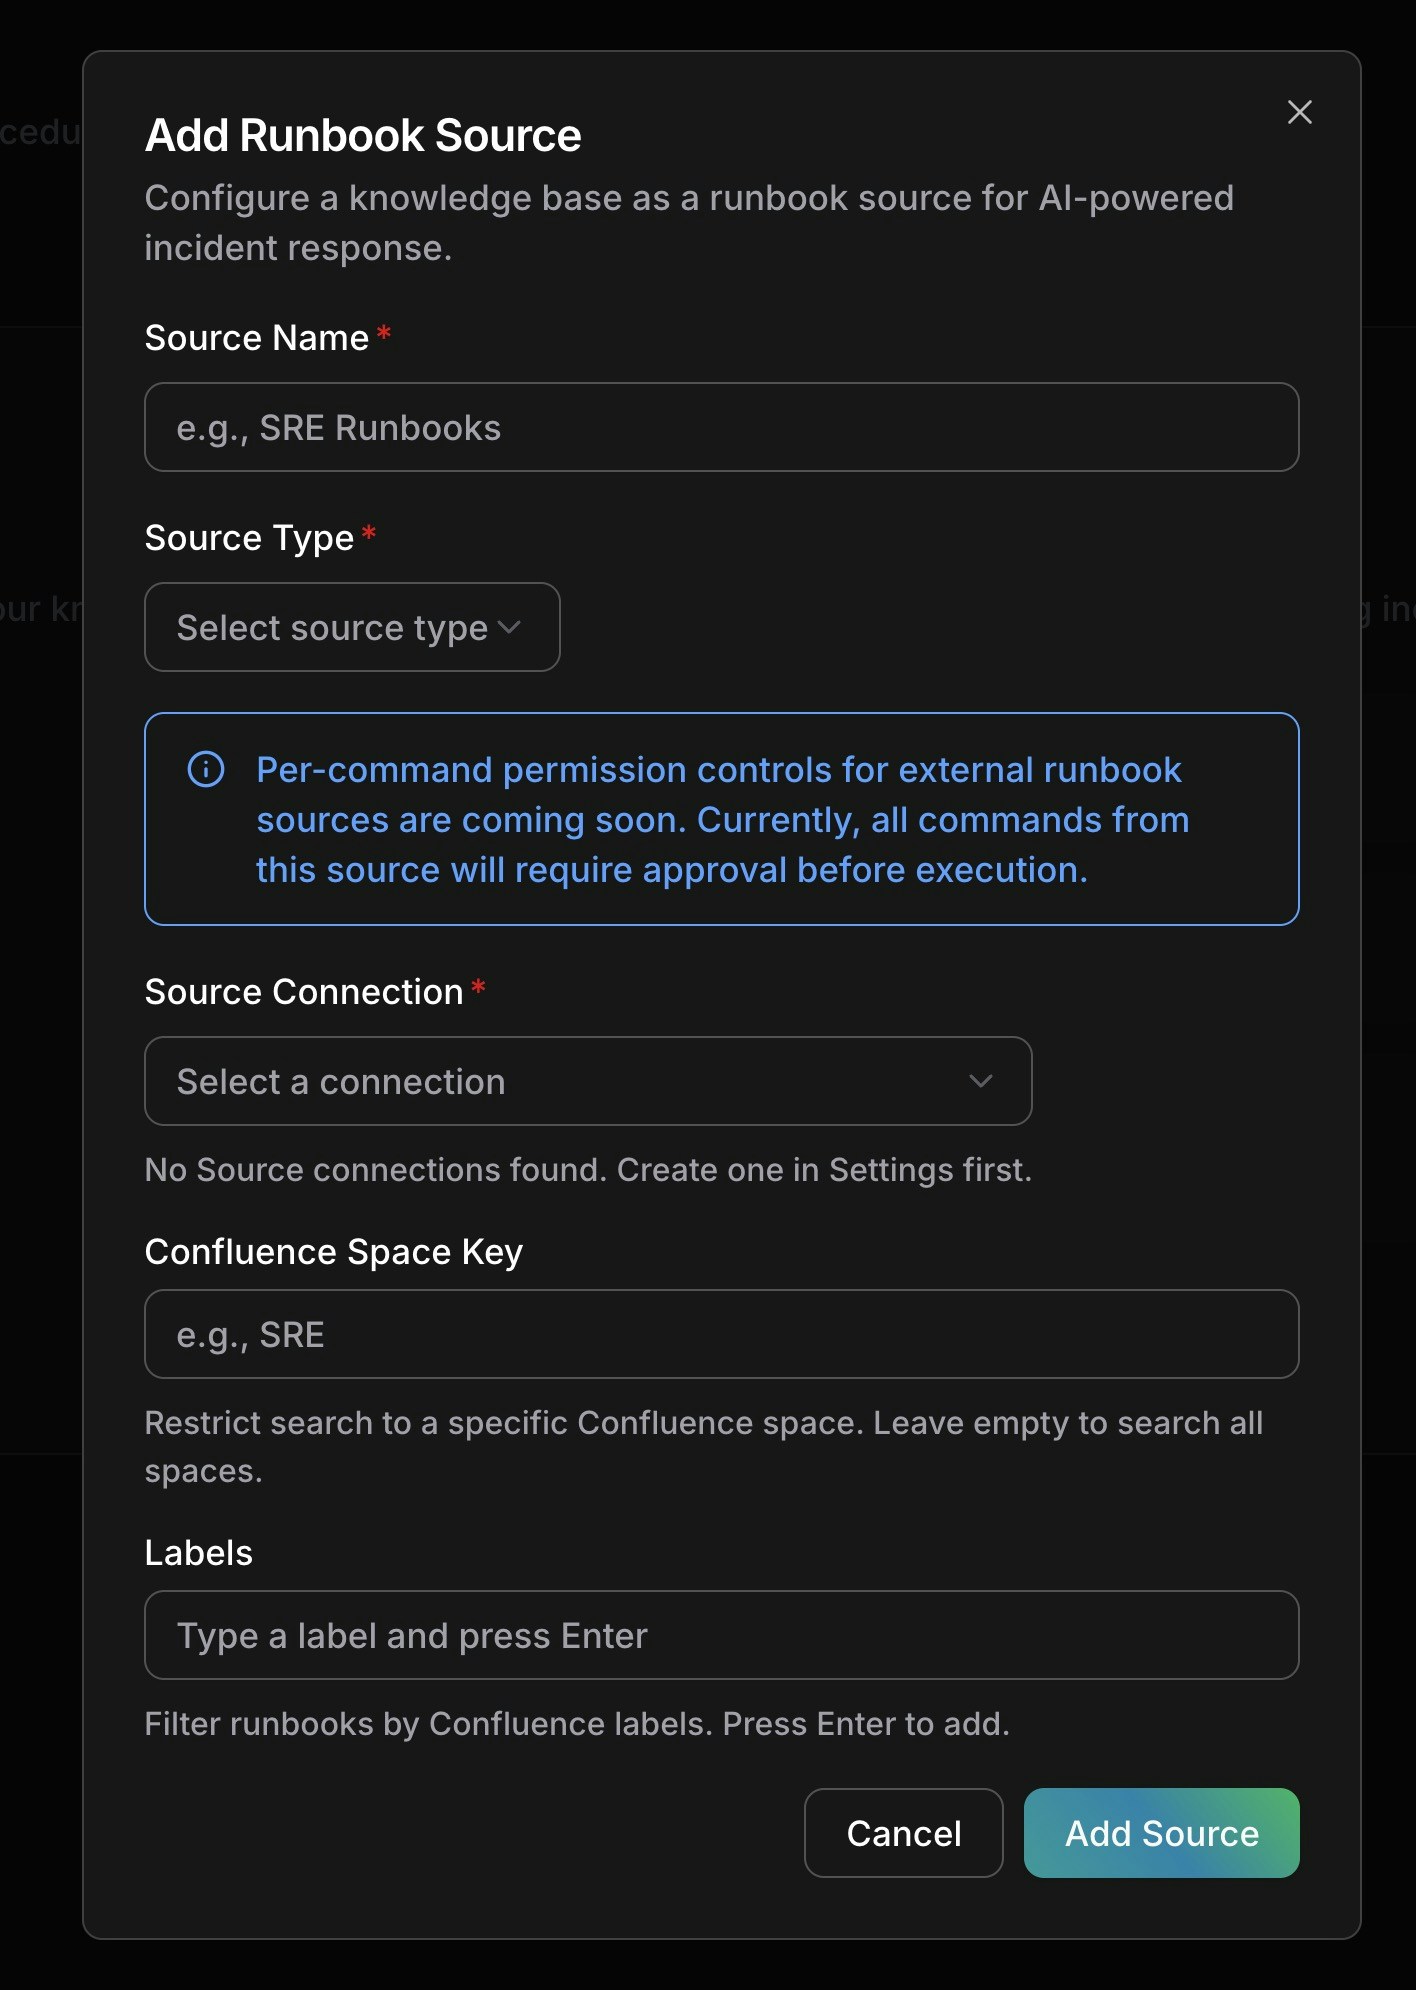
Adding a new runbook source with Confluence configuration
Confluence
Connect your Confluence knowledge base to let agents search wiki pages for operational procedures. Setup:- Click Add Source on the Runbooks page
- Enter a name (e.g., “SRE Runbooks”)
- Select Confluence as source type
- Choose your Atlassian connection (set up in Connections > Atlassian)
- Optionally restrict search to a specific Space Key (e.g.,
SRE) - Add Labels to filter pages (e.g.,
runbook,incident-response) - Click Add Source
GitHub
Point agents at a GitHub repository containing your runbook markdown files. Setup:- Click Add Source
- Select GitHub as source type
- Choose your GitHub connection (set up in Connections)
- Select the repository containing your runbooks
- Set the branch (defaults to
main) - Optionally set a path prefix to restrict search (e.g.,
docs/runbooks/) - Configure file patterns to match (defaults to
*.md) - Click Add Source
GitLab
Same workflow as GitHub, using your GitLab connection instead. Setup:- Click Add Source
- Select GitLab as source type
- Choose your GitLab connection
- Select the repository, branch, path prefix, and file patterns
- Click Add Source
Manual upload
Upload markdown runbook files directly when your procedures aren’t stored in an external system. Setup:- Click Upload Runbook on the Runbooks page
- Drag and drop
.mdfiles (up to 20 files, 5 MB each) - Edit filenames if needed before confirming
- Click Confirm Upload
kubectl apply, aws mutations, helm install) from code blocks in your markdown. These extracted commands become the basis for per-command permissions.
Per-command permissions
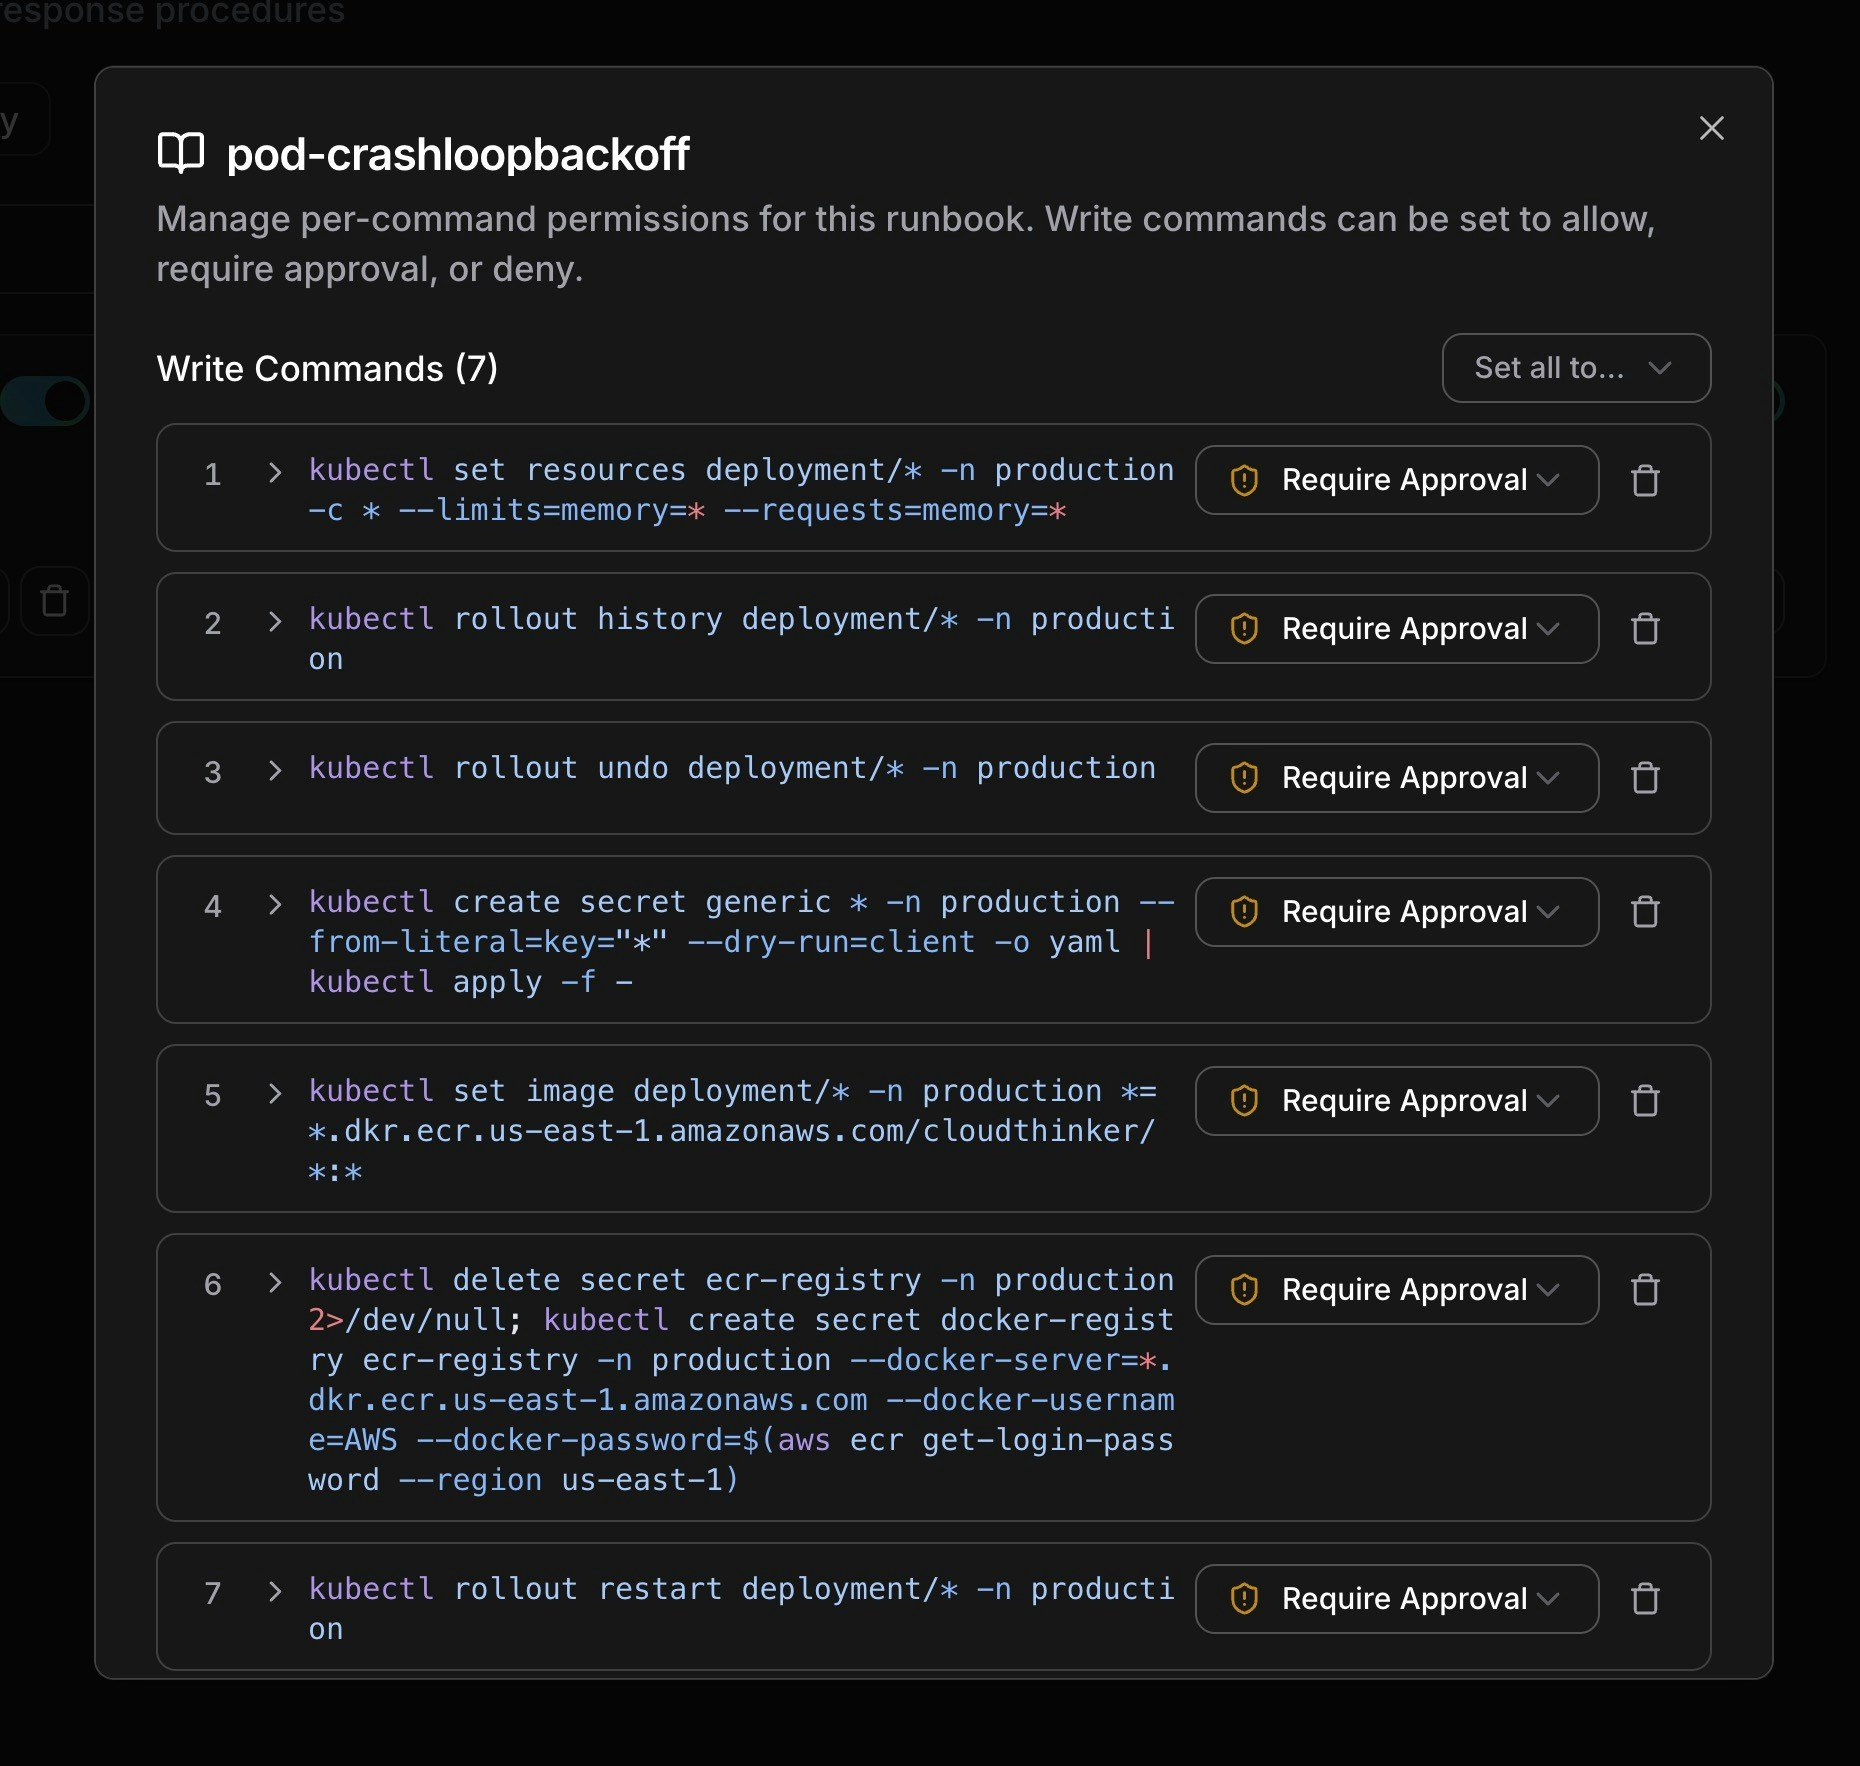
Manual runbooks unlock a unique safety feature: per-command permission controls. When you upload a markdown file, CloudThinker’s AI reads through the code blocks and extracts every write/mutating command—giving you granular control over what the agent can execute autonomously.
Per-command permission controls for a pod-crashloopbackoff runbook
How it works
- Automatic extraction: After upload, the system parses all code blocks and identifies shell commands that modify infrastructure (e.g.,
kubectl set resources,kubectl rollout restart,kubectl delete) - Read-only commands are skipped: Commands like
kubectl get,kubectl describe, andkubectl logsare not extracted—agents can always run read-only commands - Each command gets a permission: Every extracted write command starts with Require Approval by default
Permission levels
Managing commands
From the runbook detail dialog:- Set all permissions at once: Use the “Set all to…” dropdown to bulk-change all commands to Allow, Require Approval, or Deny
- Change individual permissions: Click the dropdown next to any command to adjust its permission level
- Add a command: Type a new command pattern and press Enter to add it to the list
- Remove a command: Click the delete icon to remove a command from the policy
- View full command: Click the expand arrow to see multi-line or long commands in full
Per-command permissions are currently available for manually uploaded runbooks. For external sources (Confluence, GitHub, GitLab), all commands require approval by default. Per-command controls for external sources are coming soon.
Approval workflow
When an agent finds a relevant runbook during RCA and the policy requires approval, the following flow occurs:Approval flow
- Agent discovers runbook: During investigation, the agent searches your sources and identifies a matching procedure
- Policy evaluation: The system checks your workspace approval policies against the runbook and its commands
- Notification sent: If approval is required, you receive notifications on all configured channels:
- Email: Runbook title, source link, and policy reason
- Slack: Interactive notification with incident context
- In-app: Badge on the incident showing pending approvals
- You approve or reject: Click Approve to let the agent proceed, or Reject to block execution
- Agent continues: On approval, the agent executes the runbook commands. On rejection, the agent continues the investigation without executing
Approval states
Execution states
After approval, each execution tracks its outcome:Viewing execution history
Switch to the Execution History tab on the Runbooks page to see all runbook executions across incidents. You can:- Search by runbook title
- See policy decisions, approval status, and execution outcomes
- Track which runbooks were used for which incidents
Best practices
Source Organization:- Name sources descriptively (e.g., “K8s Emergency Runbooks”, “Database Failover Procedures”)
- Use path prefixes and file patterns to keep searches focused and fast
- For Confluence, use labels to categorize runbooks by domain (e.g.,
kubernetes,database,networking)
- Start with Require Approval for all commands (the default) until you build confidence
- Gradually move well-tested, low-risk commands to Allow (e.g., scaling operations, log collection)
- Keep destructive commands (delete, drop, force) on Require Approval permanently
- Use Deny for commands that should never be automated (e.g., production database drops)
- Write runbooks in markdown with clear code blocks using shell language hints (
```bash) - Use one command per line for best extraction results
- Include context about when each procedure should be used—agents use this to match runbooks to incidents
- Keep runbooks focused: one procedure per file works better than a single document covering everything
Next steps
Root cause analysis
Learn how AI agents investigate incidents and when runbooks are triggered during the analysis workflow.
Approval policies
Configure workspace-level approval policies that control what agents can execute autonomously.