

What skills encode
Agents arrive knowing what good looks like in general, not what good looks like in your codebase, your runbooks, or your review standards. A skill externalizes that context so nobody retypes it into every conversation, and senior expertise becomes a team-wide asset instead of tacit knowledge held by one engineer.Prerequisites
- A CloudThinker workspace
- The workspace-settings edit permission — without it the New Skill control is hidden
- Familiarity with the SKILL.md format if you plan to write skills manually
Create a skill
1
Open Skills
Navigate to Skills from the sidebar, or open Chat Settings (the gear icon beside the + button in the chat prompt box) and select Skills under Agent Configuration. This page lists every skill in the workspace with its enable toggle and feature assignments.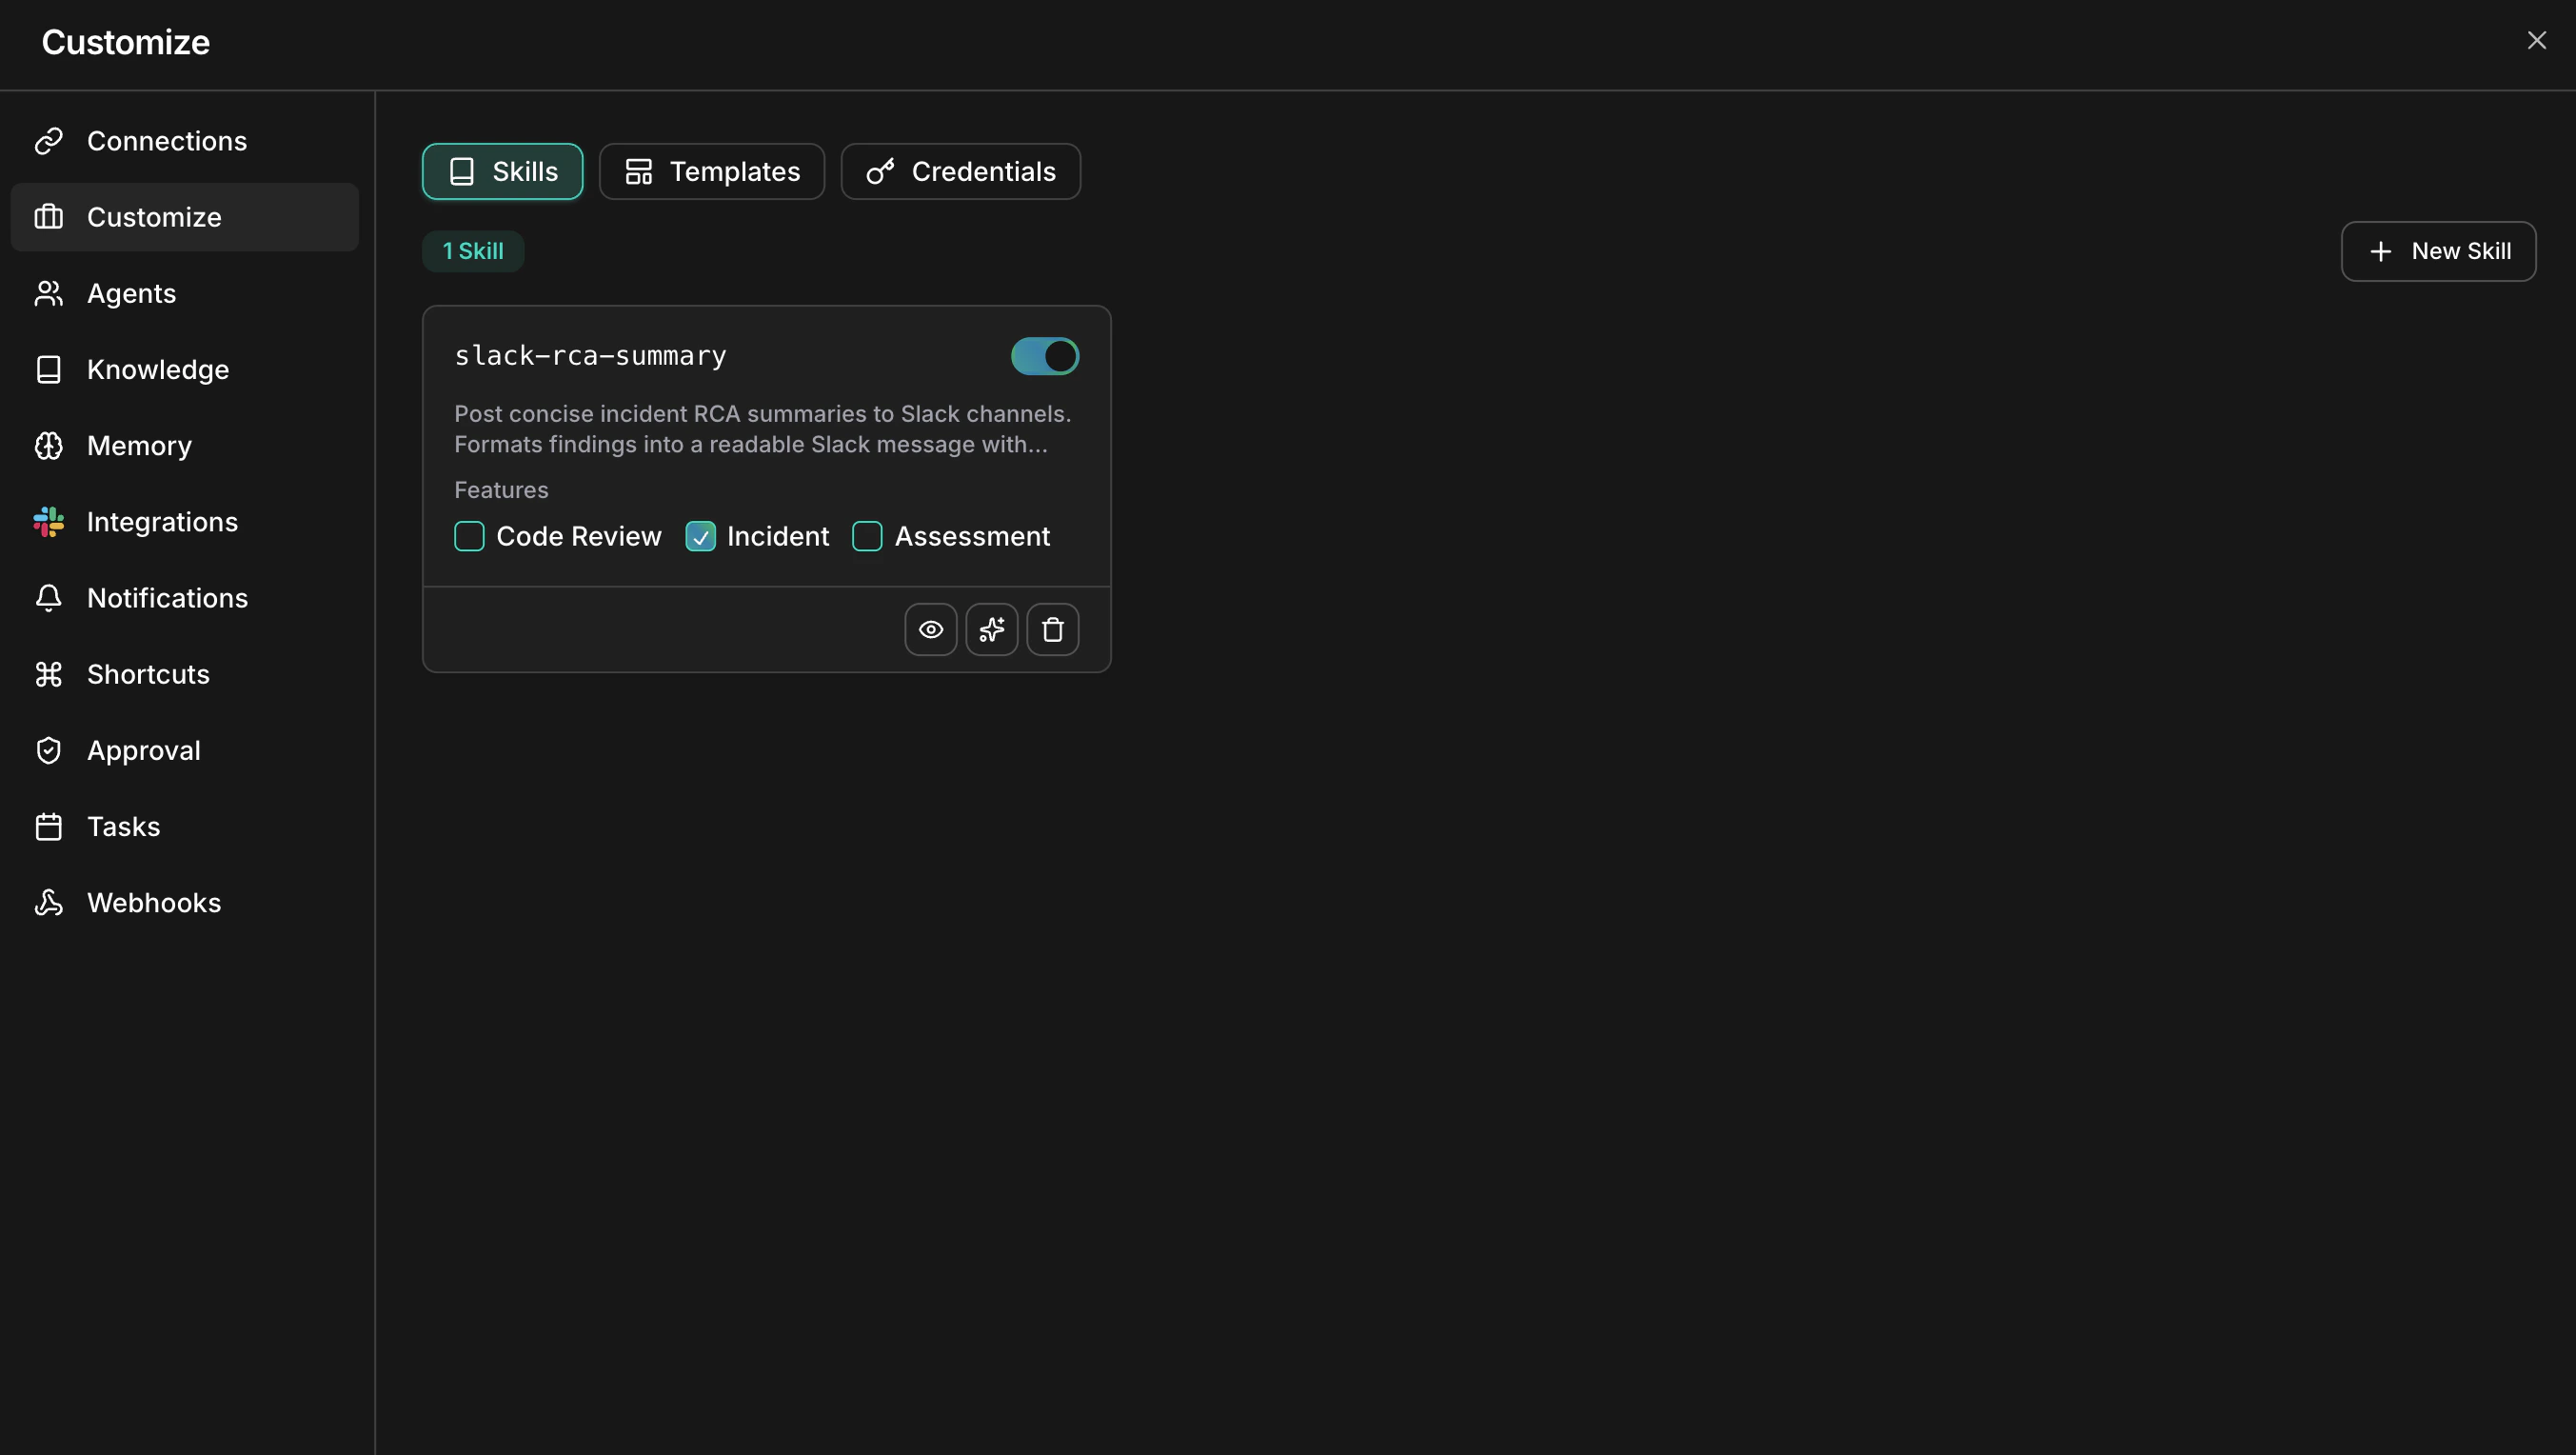
2
Click New Skill
Choose a creation method from the dropdown.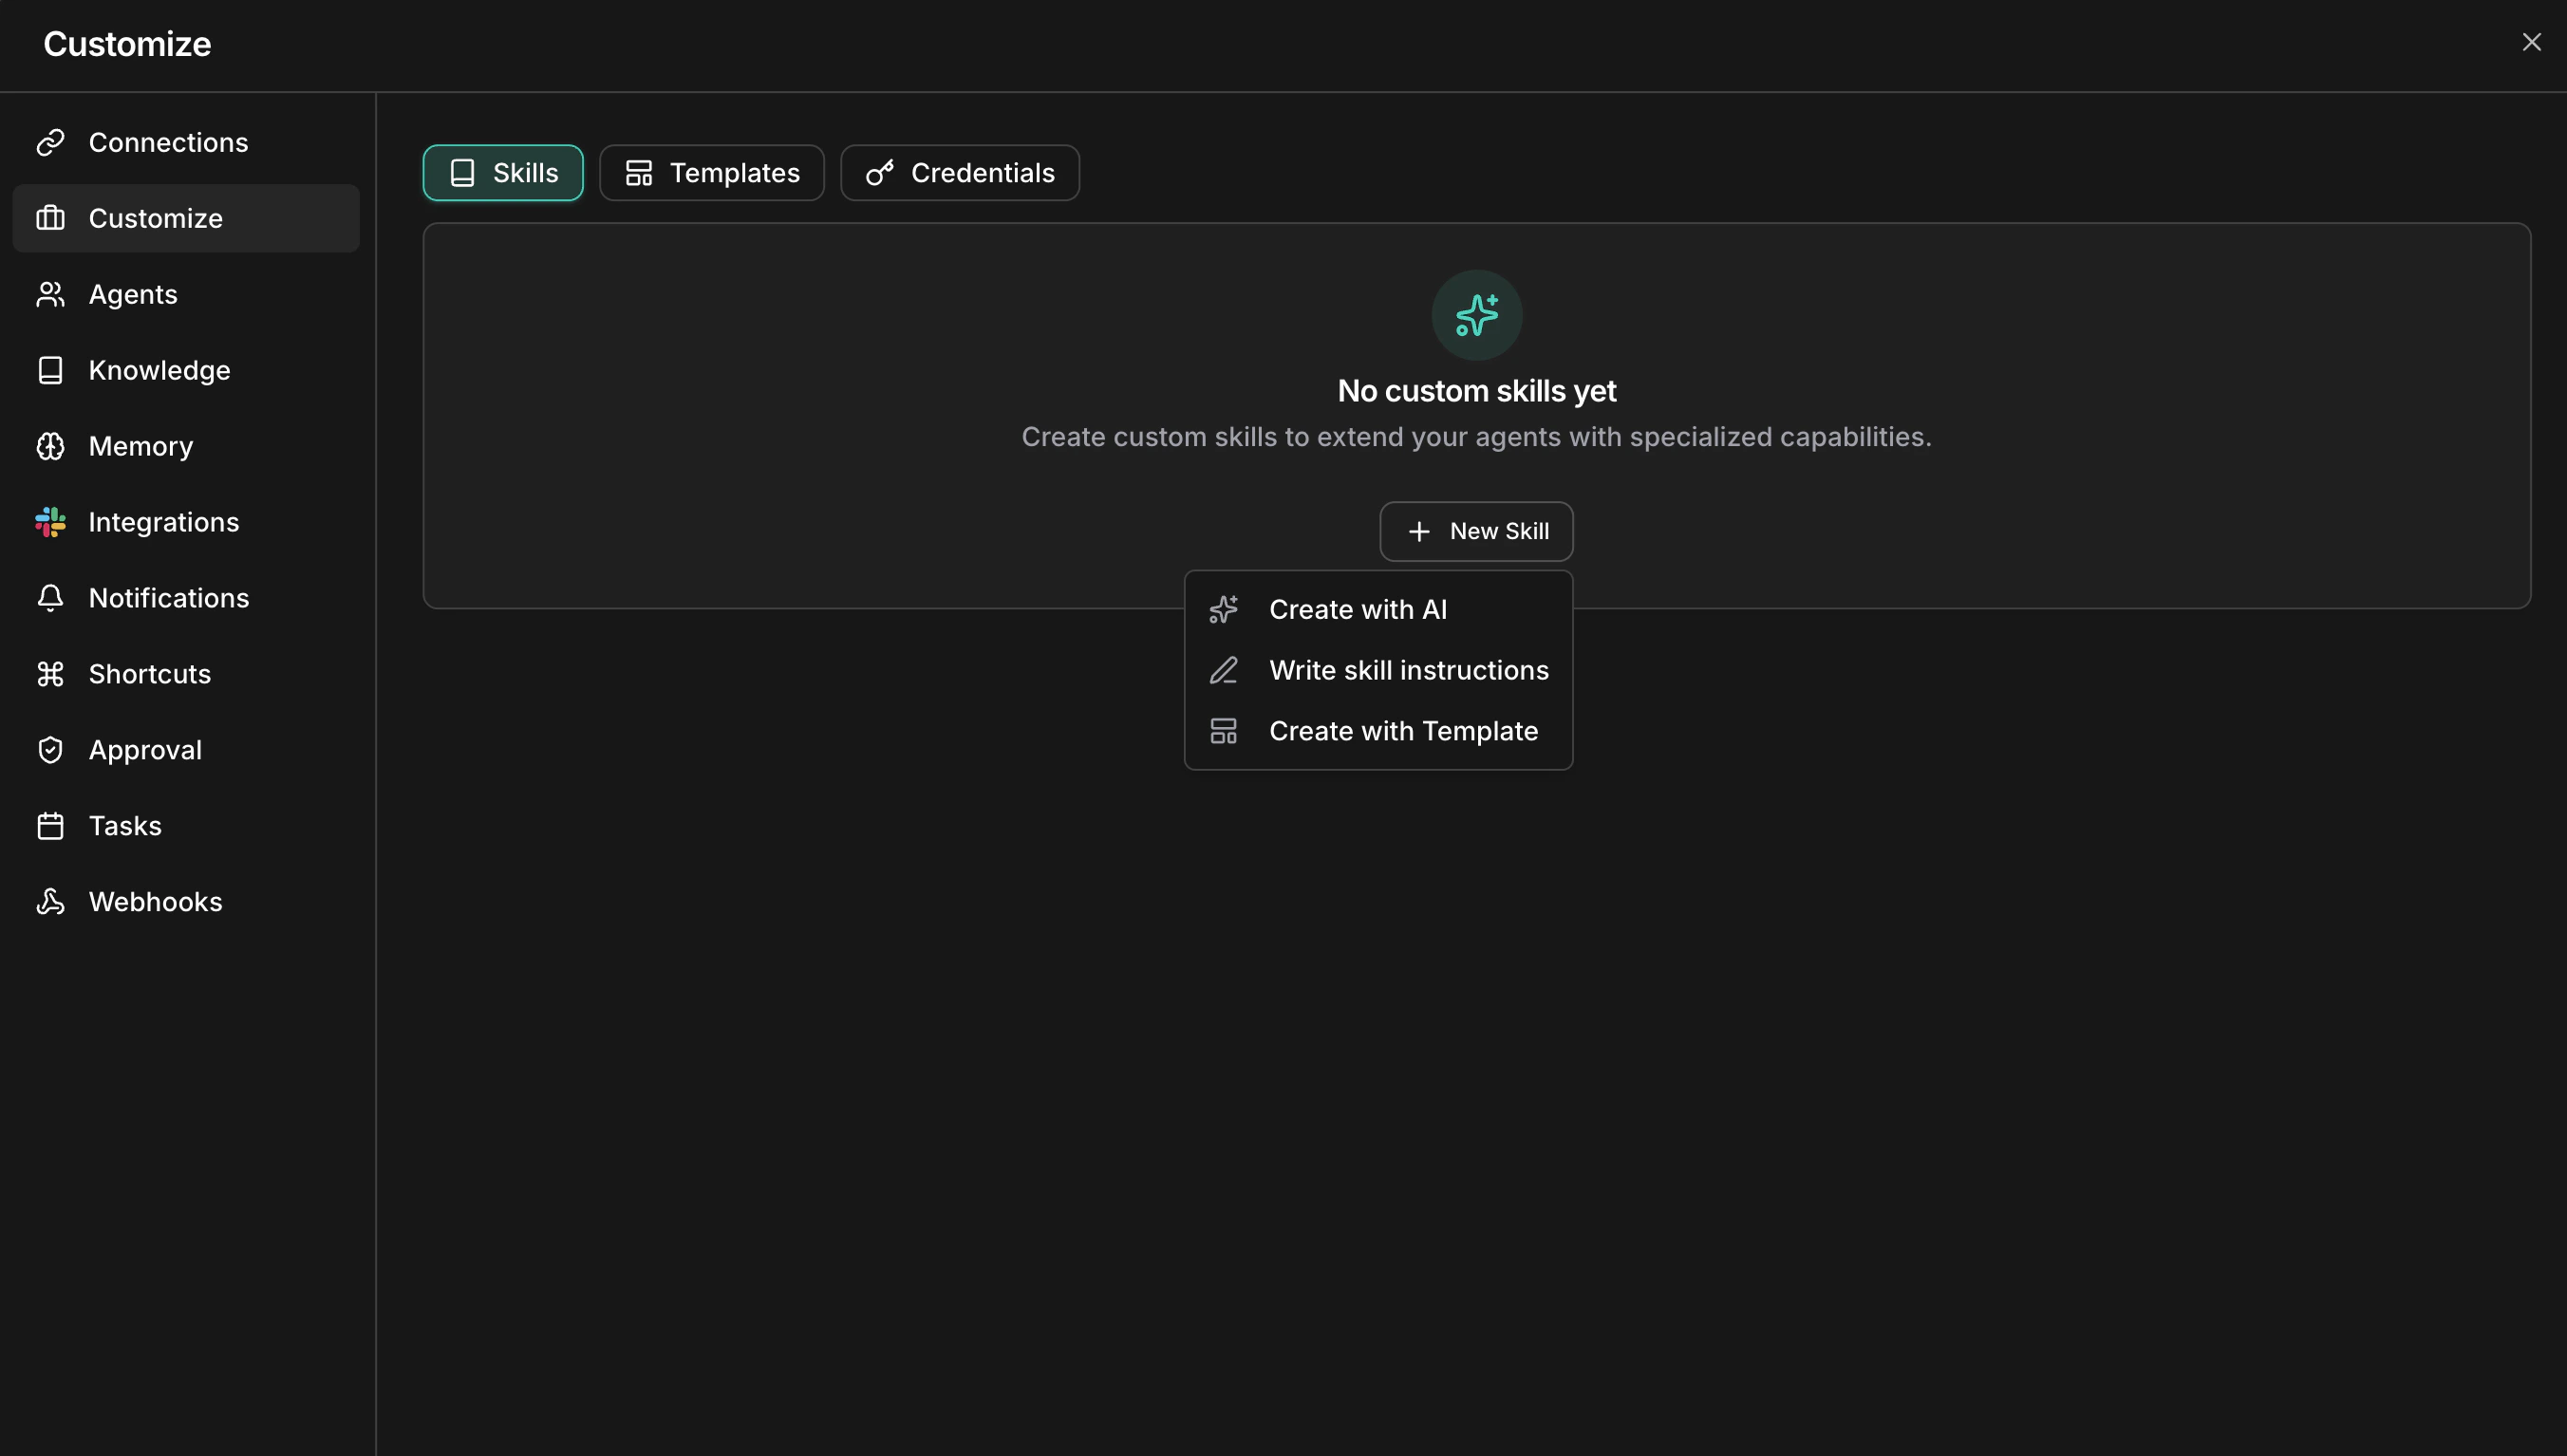
3
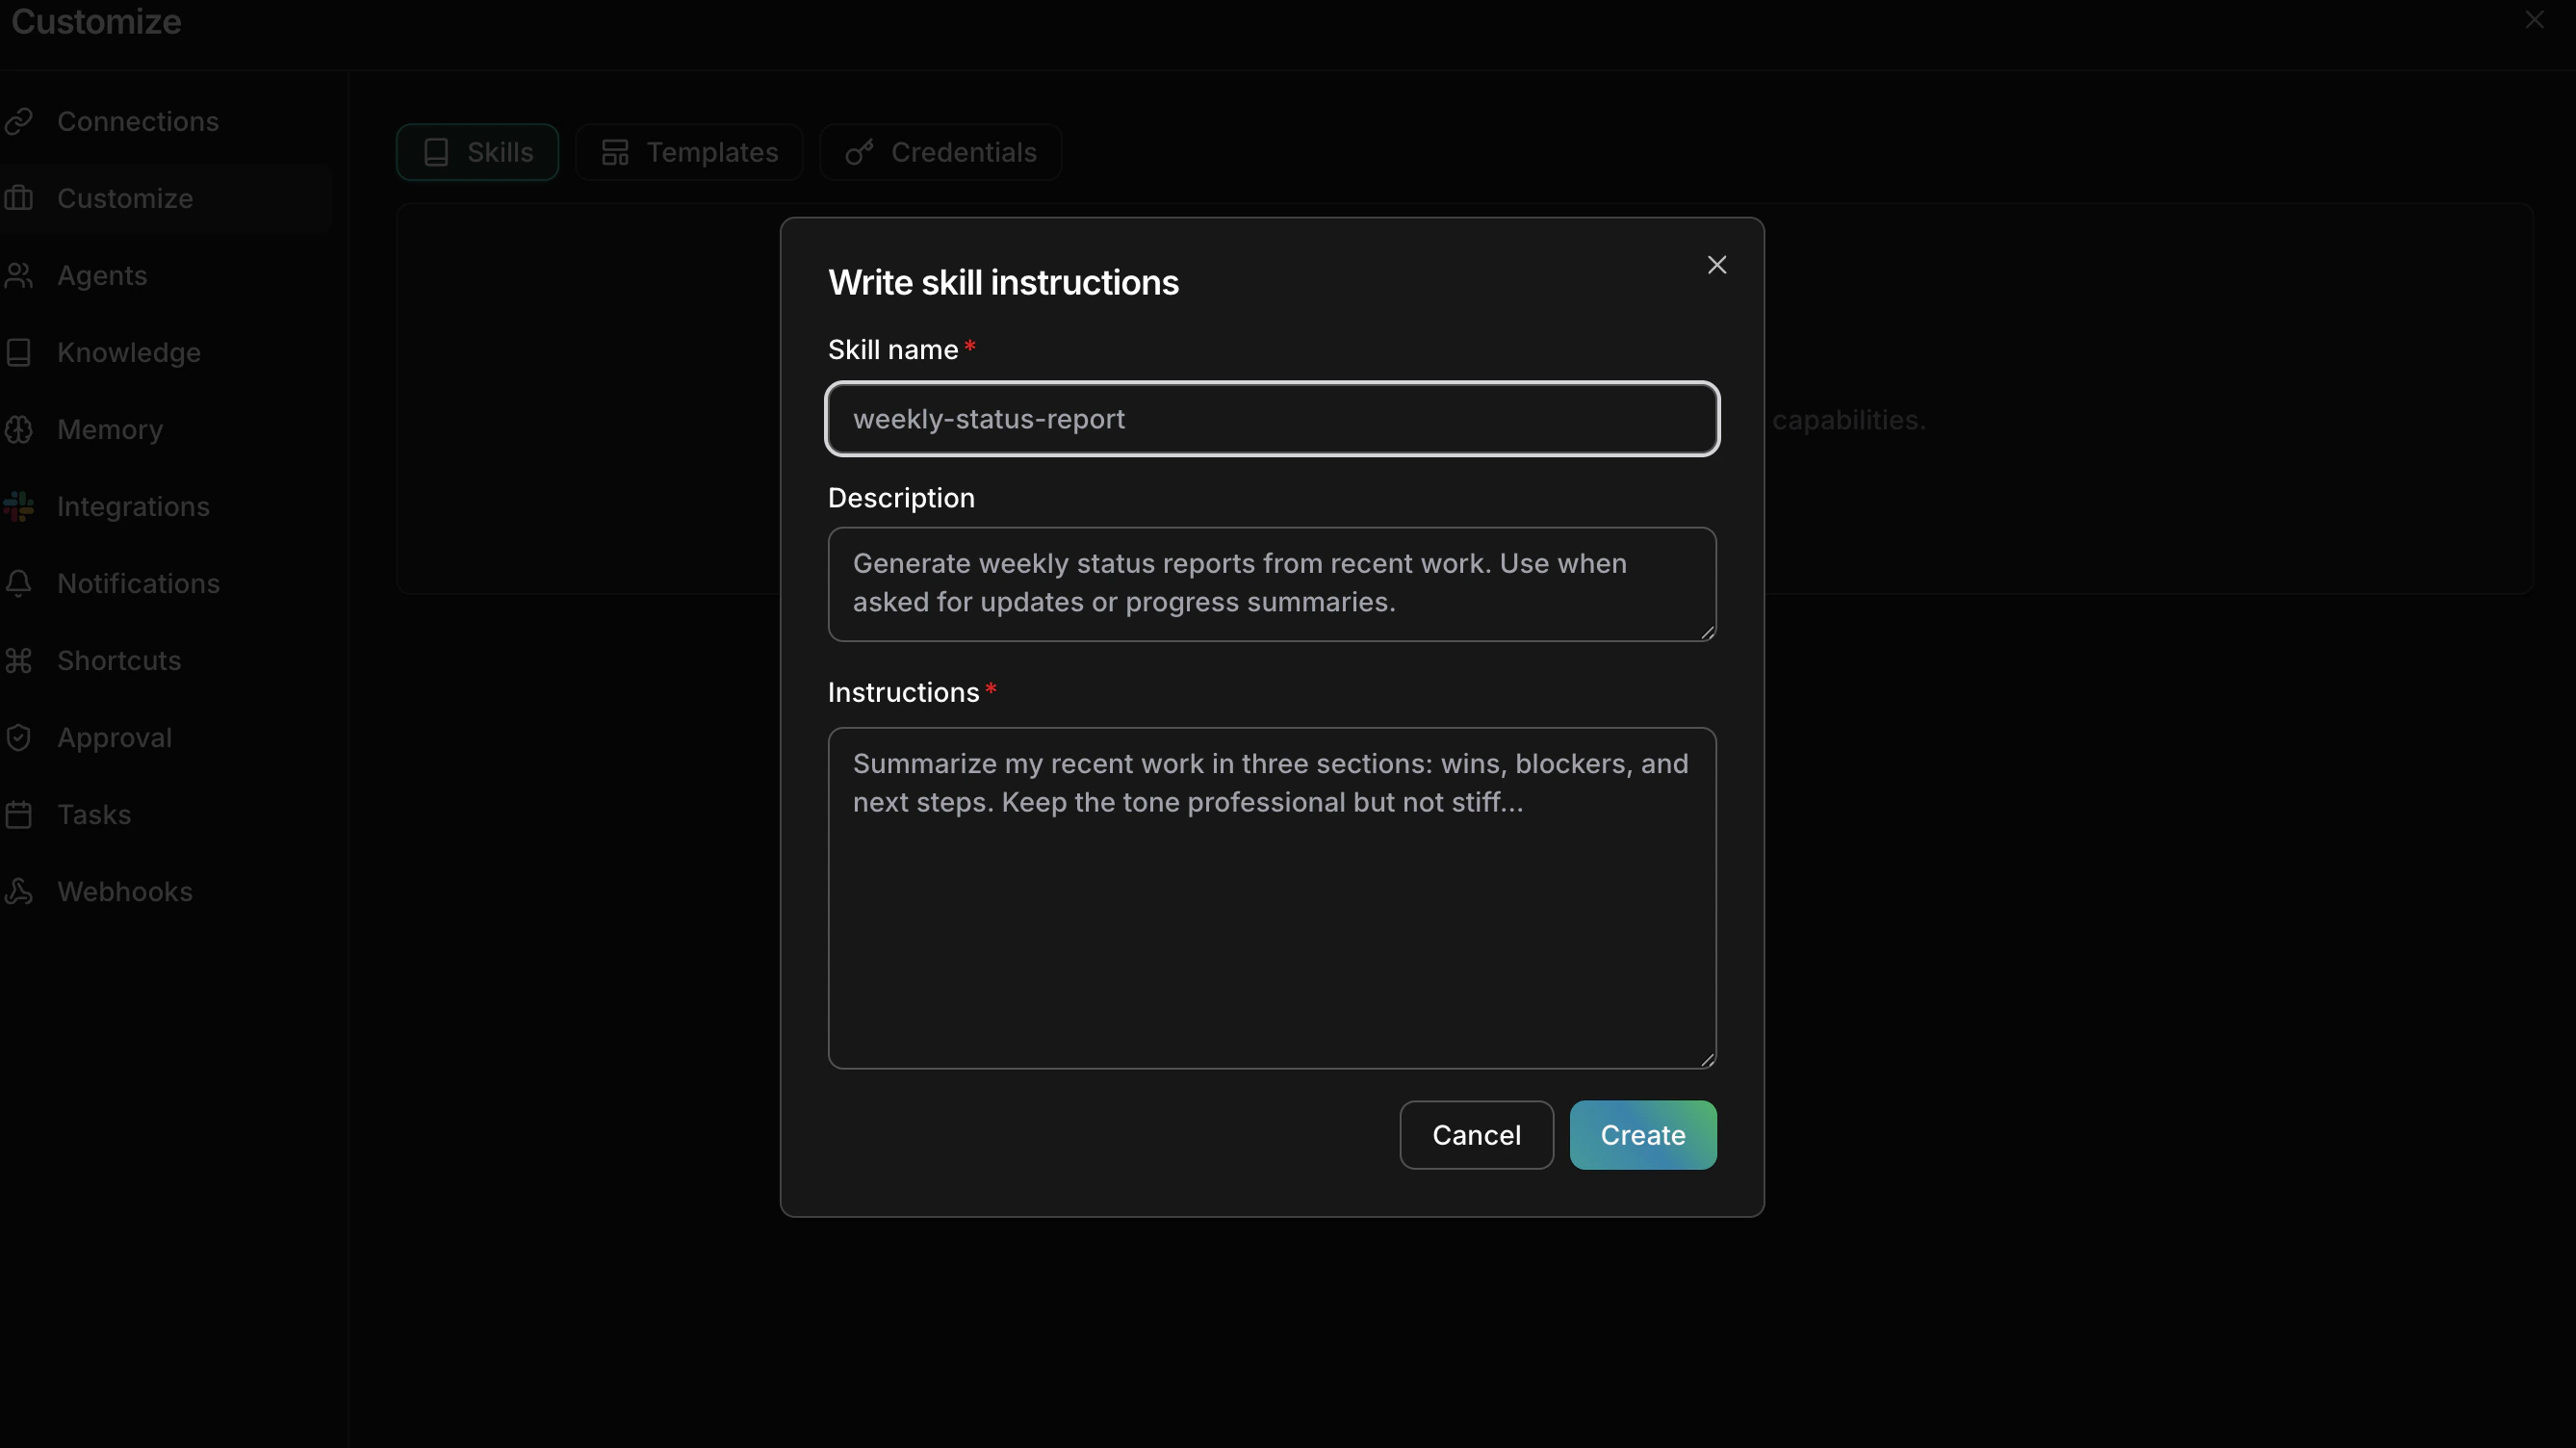
Create, write, or upload the skill
- Create with CloudThinker
- Write skill instructions
- Upload zip file
- Browse Skills Hub
Describe what you need in plain language and let the skill creation agent draft it.
- Click Create with CloudThinker to open a chat session.
- Describe one concrete rule your team applies — a naming convention, a review checklist item, a deprecation warning.
- The agent generates a SKILL.md with frontmatter and structured instructions.
- Review the draft and click Save.
Enable and attach a skill
New workspace skills start enabled and Chat-attached; the other surfaces require an attachment.1
Toggle the skill on
Use the switch on the skill card. A disabled skill stays saved but is hidden from every surface, which is useful while you draft changes.
2
Attach to surfaces
Check the surfaces where the skill applies. A skill can belong to several surfaces at once:
- Chat — the default attachment for a new workspace skill
- Review — used during pull request analysis
- Incident — used during incident investigation and root cause analysis
- Assessment — used during infrastructure assessments
3
Verify it works
Trigger work where the rule should change the result — see how skills are applied.Success state: a result that needs the rule reflects it without you restating the instruction. If it does not, rewrite the skill with concrete examples and retest.
Manage skills
View details
Click a skill card to open the detail view: file tree on the left, rendered markdown on the right. Read the instructions end to end — a rule that is ambiguous to you will be ambiguous to the agent.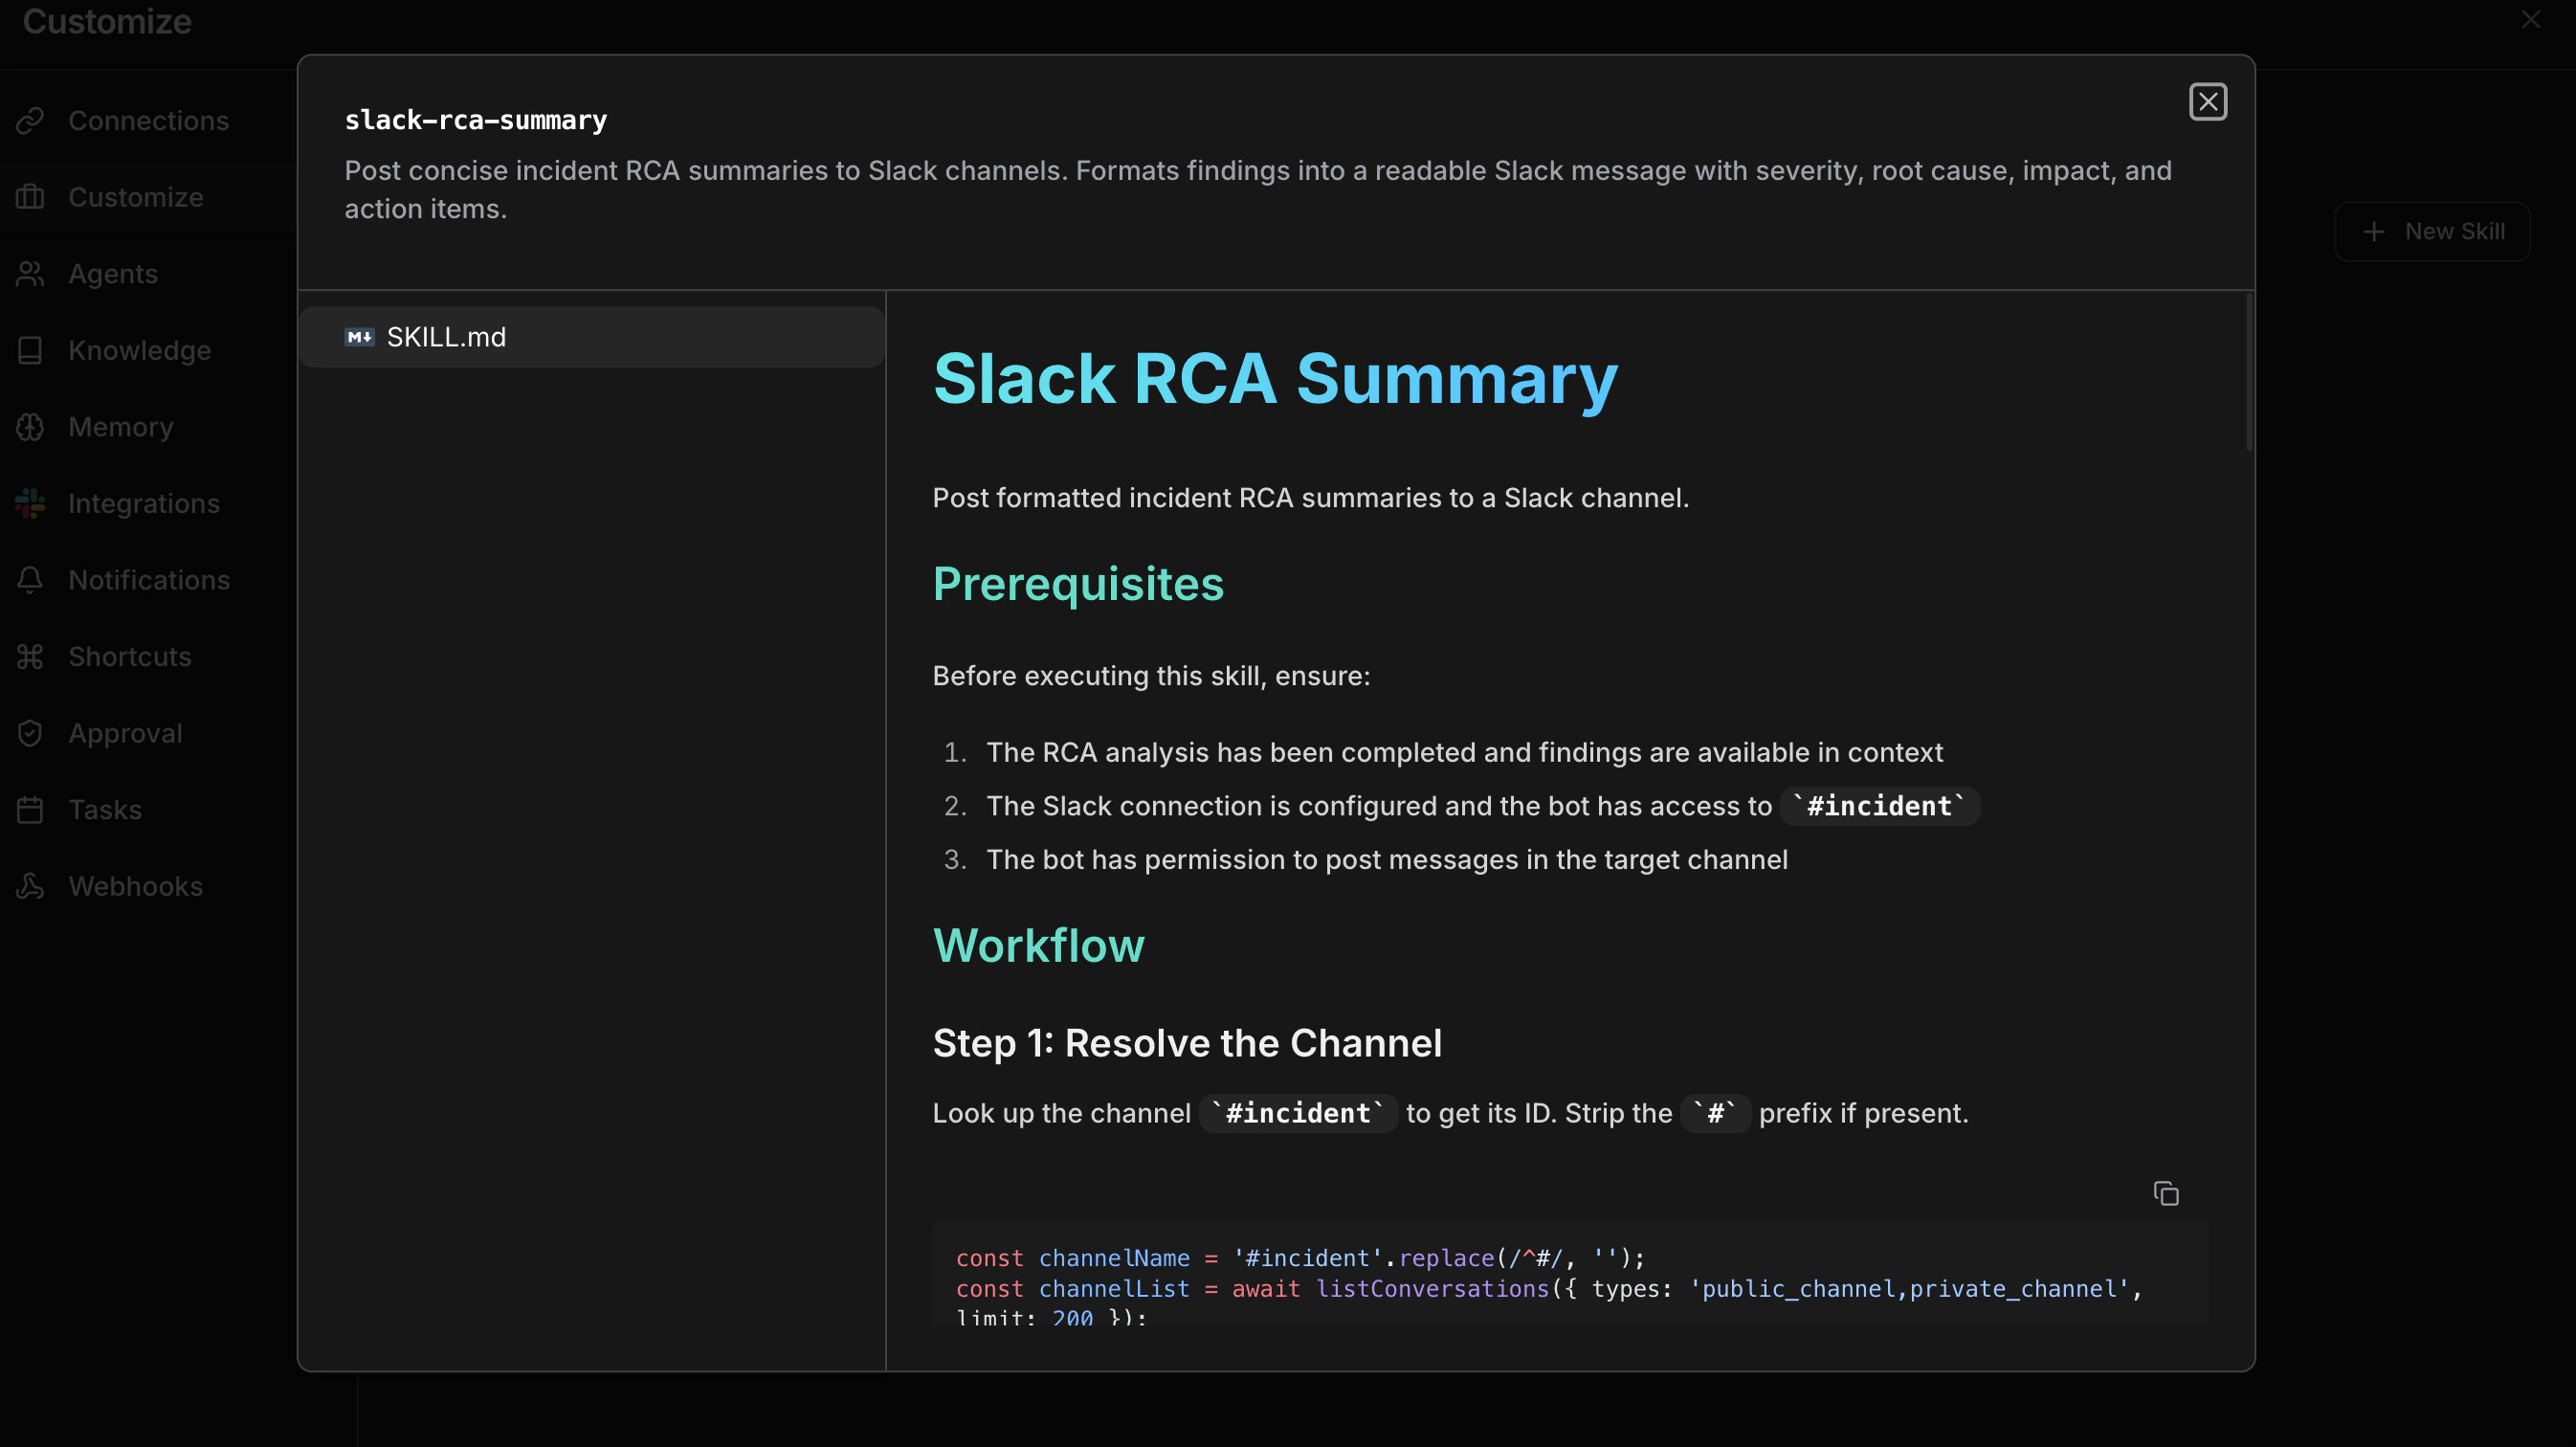
Edit with AI
From the detail view, click Edit with AI to refine the skill through conversation — add examples, remove ambiguity, restructure sections. The agent reads the existing content before making changes. When you manually editSKILL.md, its name frontmatter must match the selected skill name. The edit is rejected if the name is missing or different.
Delete
Remove a skill permanently from the detail view.Troubleshooting
This skill name is already in use
This skill name is already in use
Another skill in the workspace has that name. Pick a different name.
Skill name is reserved
Skill name is reserved
The name matches a skill CloudThinker ships in its public catalog, which would wrongly give yours an Official badge. Pick a different name.
Only .zip files are accepted
Only .zip files are accepted
The Skills page uploads
.zip packages only. Put your SKILL.md in a folder and zip that folder.Writing effective skills
- Be specific. Concrete rules with examples beat vague guidelines — “use kebab-case for multi-word paths” outperforms “follow our naming style”.
- One domain per skill. Separate security rules from performance guidelines so you can assign them independently.
- Lead with examples. Agents follow demonstrated patterns more reliably than abstract explanations.
- Test on one surface first. Keep a new skill attached only to Chat, review a few real results, then attach it more broadly.
- Iterate. Use Edit with AI to sharpen skills based on review results and team feedback.
Next steps
Skill format
Learn the SKILL.md file structure, frontmatter reference, and best practices for writing effective instructions.
Skills overview
Understand how skills fit into the CloudThinker platform and agent workflow.