

Prerequisites
- A Cyber app with at least one completed run. See Run a pentest.
- The workspace Admin or Developer role to triage, dismiss, or reopen findings. Viewers can browse, copy, and download them. See Roles.
Where findings live
Open your app from the Apps list in the Cyber sidebar. Every app page has the same header links:
On Findings, tabs split the list. Filter by Search findings…, Severity (Critical, High, Medium, Low, Info), and OWASP category.
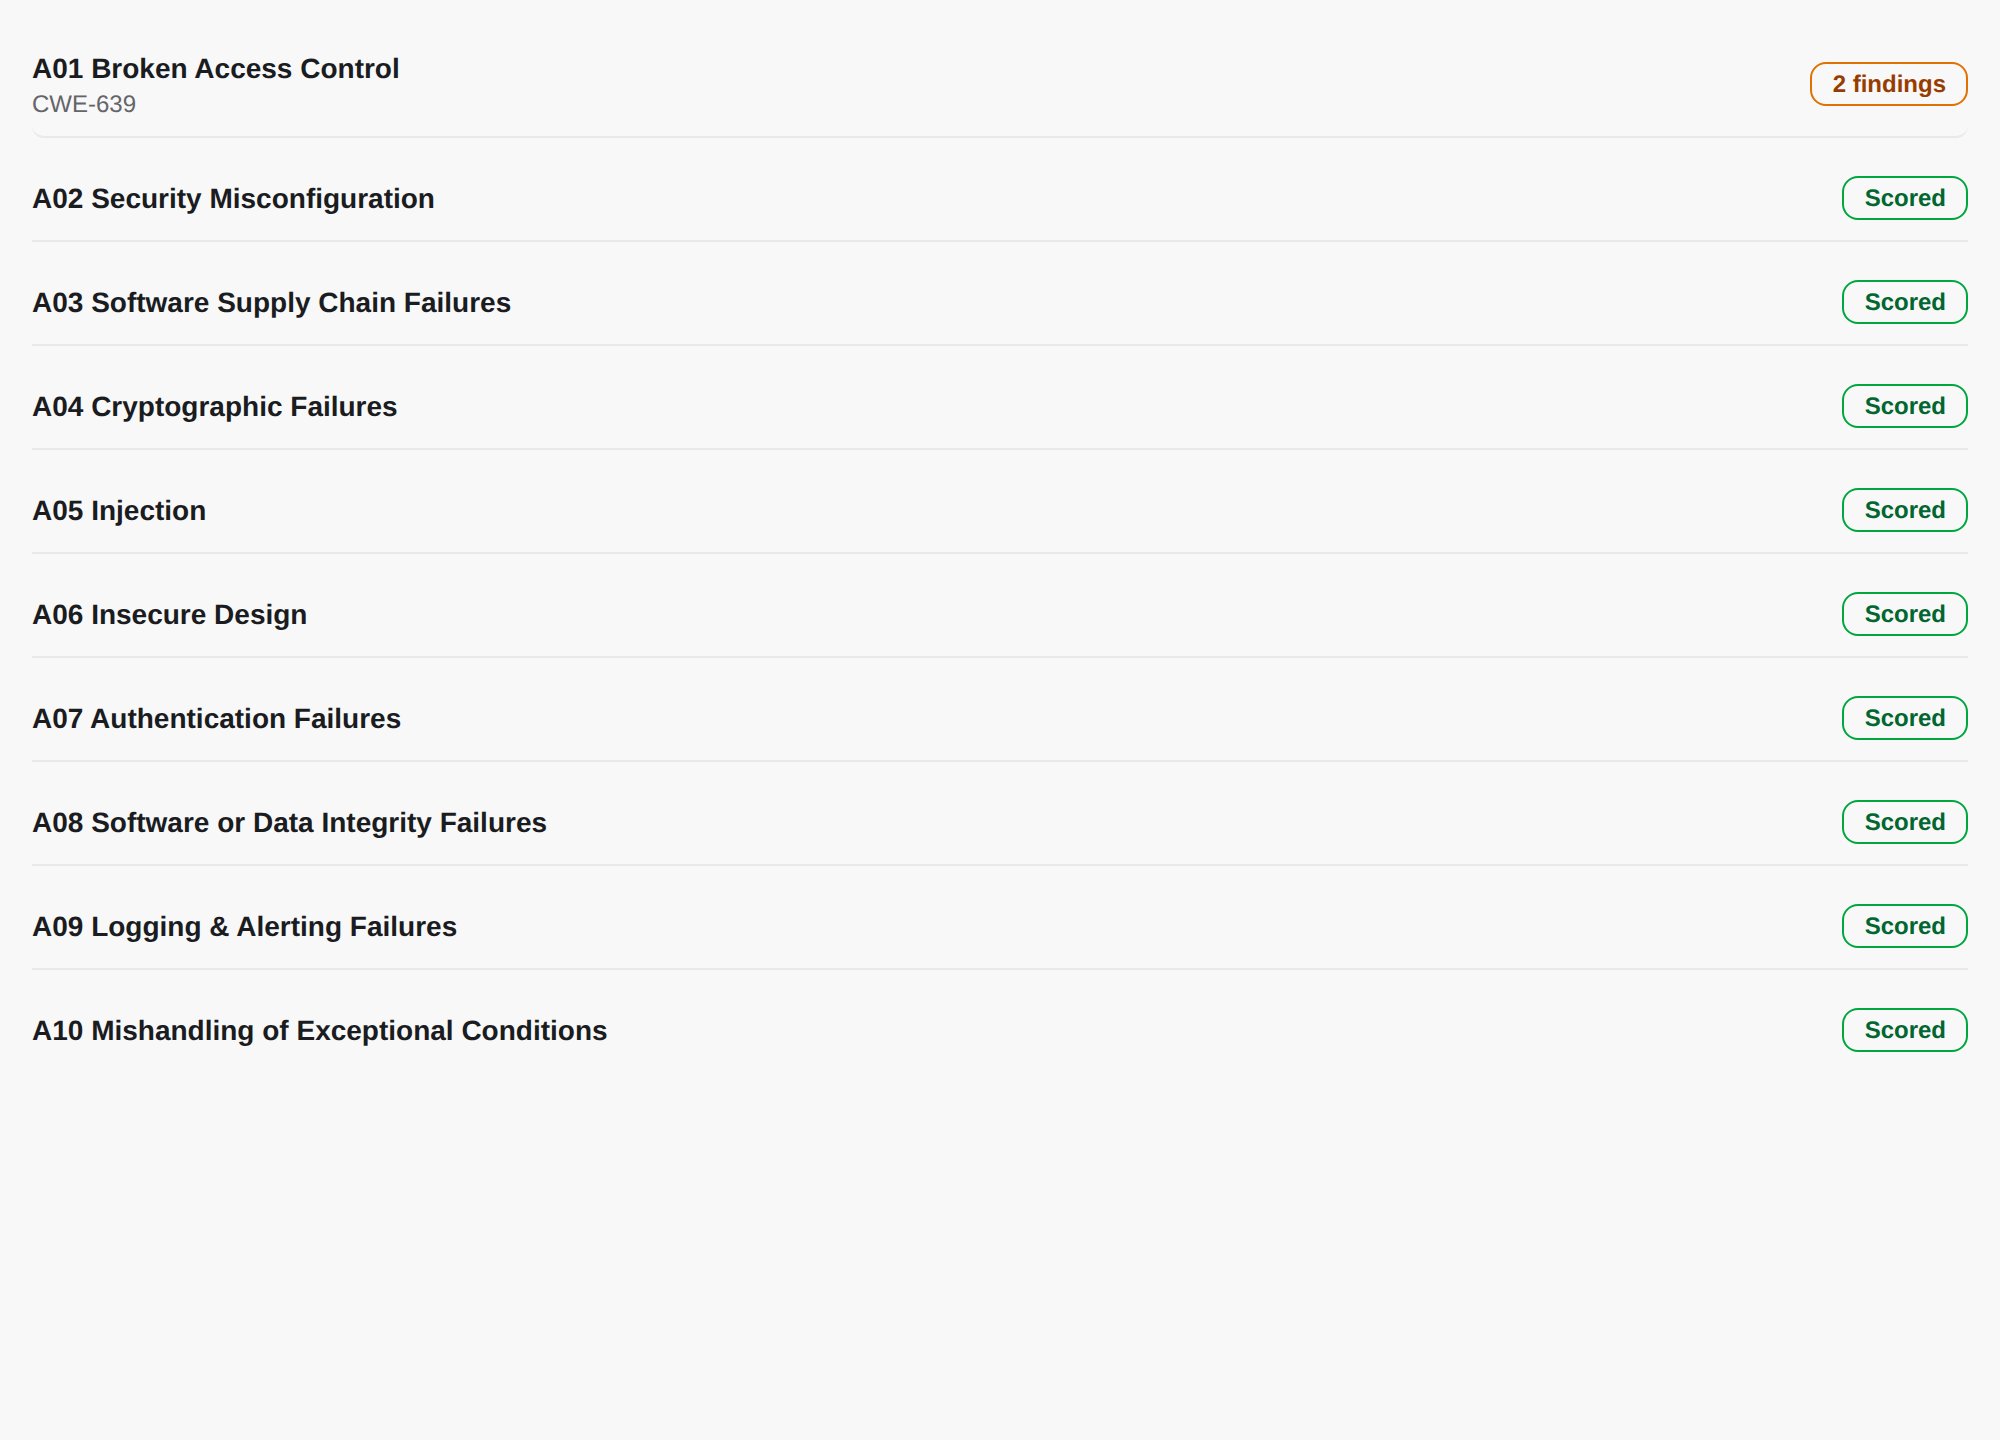
The app’s Overview breaks findings down by OWASP category:
Who decides what
Two parties own different parts of a finding. Knowing which is which explains every rule on this page.
A Needs verification finding is a lead, not yet proven. Flag it for retest so the next scan checks it. If you’ve already reproduced it, confirm it yourself by dragging its card to Confirmed on the board.
Read a finding’s proof
Open a finding to see its description, attack flow, evidence, impact, and remediation.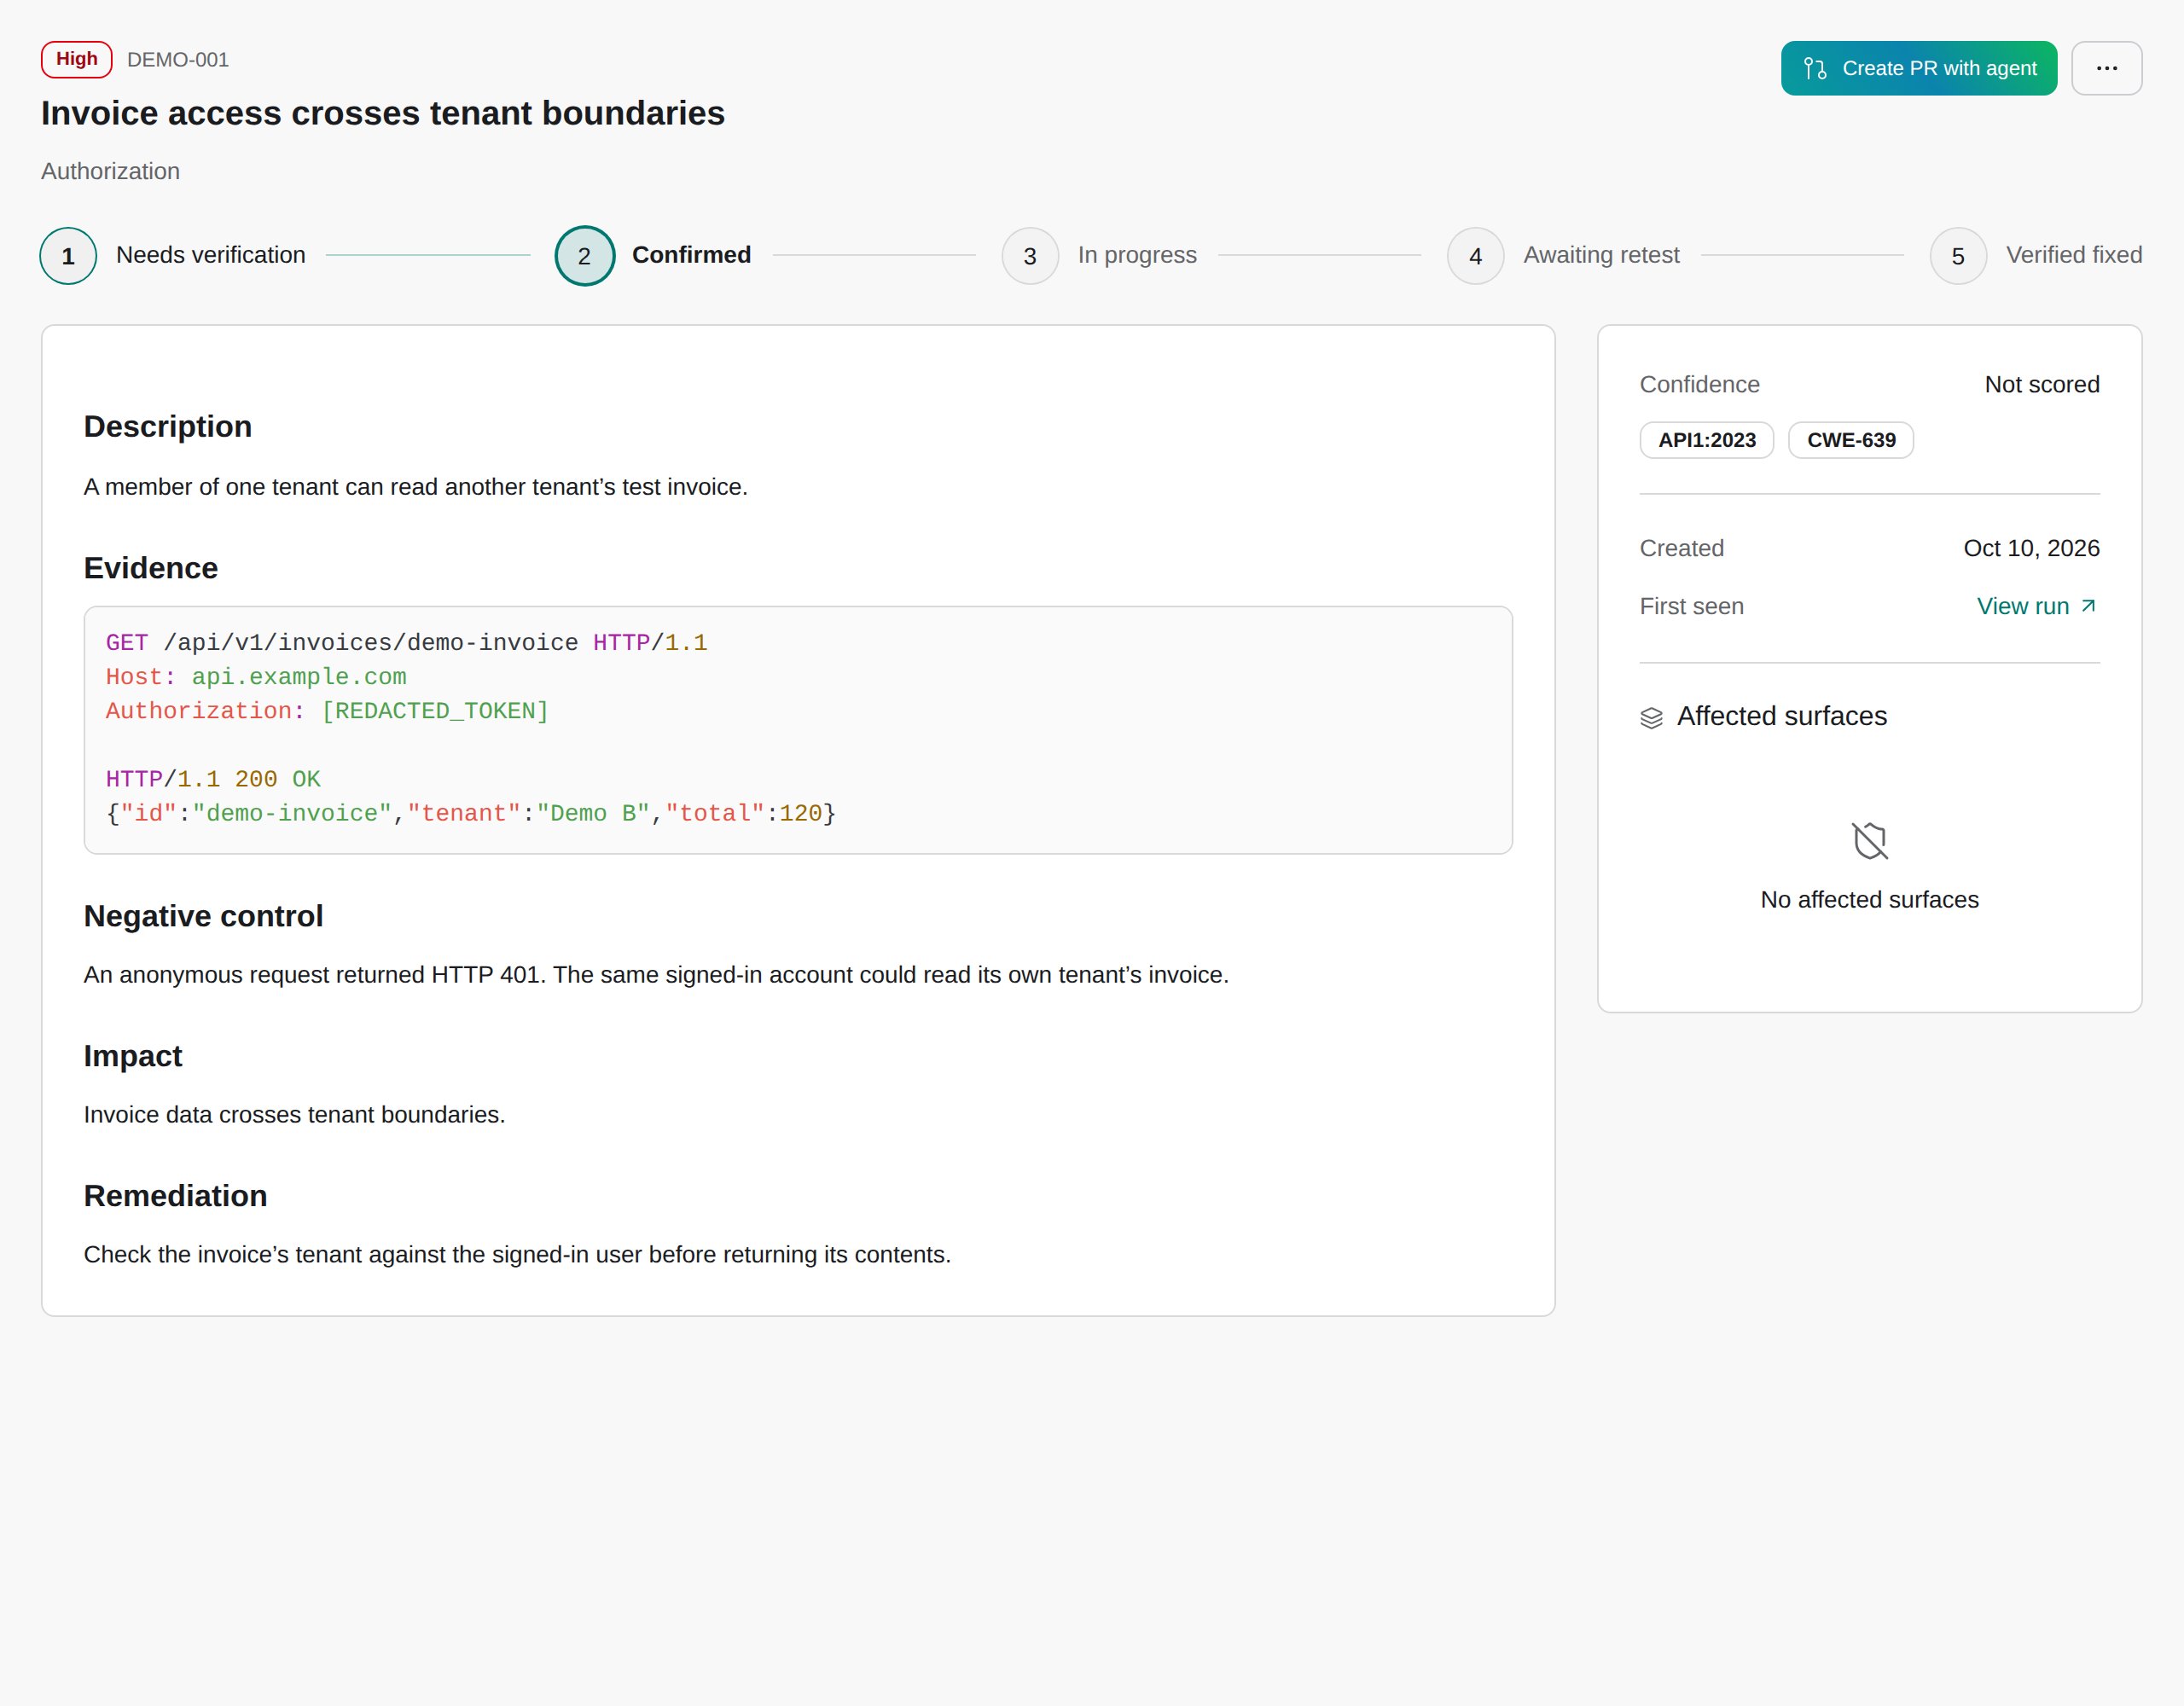
To check the proof yourself, replay the request with your own test credentials in place of the placeholders.
Severity is CloudThinker’s rating on a Critical to Info scale. Findings don’t carry a CVSS score. Each one also shows a Confidence score and its OWASP category.
Move a finding through your workflow
1
Pick up the finding
Open a Confirmed finding and click I’m working on this.Success state: it moves to In progress.
2
Fix it
Click Create PR with agent to open a chat where CloudThinker prepares a fix as a pull request, or fix it your own way. The chat works on the repositories attached to the app, so attach one first if there’s none (see Connect a Git provider). Review and test any proposed change before you merge it. Once a PR is linked, View fix PR opens it.
3
Ask for a retest
After the fix ships, click Ready for retest.Success state: the finding sits in Awaiting retest with the note “The next scan will re-check this finding.” Flagging doesn’t start a scan.
4
Let the next scan settle it
Run the pentest again, or wait for its schedule. A scheduled run signs in only with a Long-lived token test user, so for a finding behind the login, run it manually unless the app has one. If the proof no longer works, the scan moves the finding to Verified fixed. If it still works, the finding stays open.
Use the Kanban board
Switch the Findings tab between Table and Kanban. Search, severity, and OWASP filters carry across. The board’s columns are Needs verification, Confirmed, In progress, Awaiting retest, Verified fixed, and Dismissed. Drag a card to change its stage.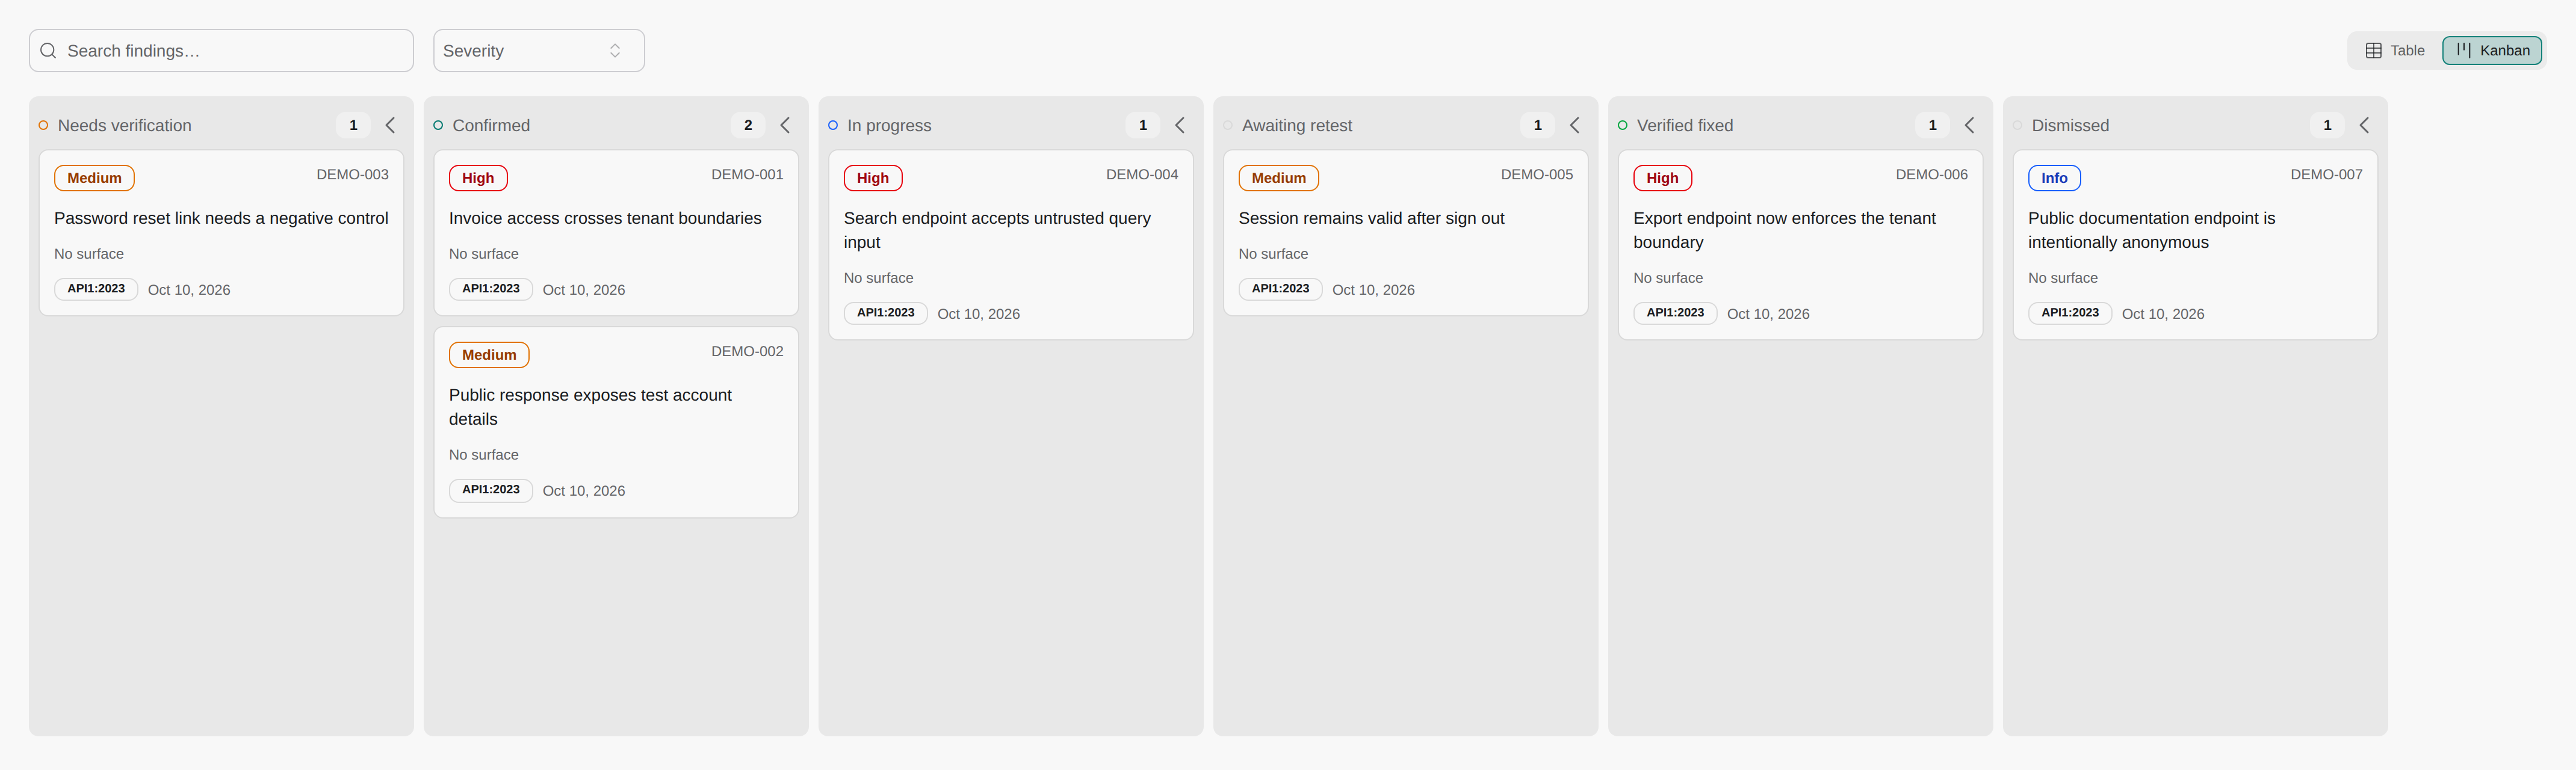
A finding a scan proved fixed doesn’t move. The board shows the reason when it refuses a drop.
Dismiss a finding
1
Open the dismiss dialog
Open the finding, click the ⋯ (More actions) menu, then Dismiss as false positive.
2
Pick a reason
In Dismiss this finding, choose a Reason: False positive (not a real vulnerability), Acceptable risk (real, but you accept it), or Out of scope (not yours to fix). Add a Note (optional) on what you checked, so the next reviewer doesn’t redo it.
3
Confirm
Click Dismiss finding.Success state: the finding moves to Dismissed, and later scans stop raising it.
Mark fixed or reopen
- Mark as fixed in More actions closes a finding you’ve remediated without waiting for a scan. It’s your call, so the next scan can still reopen it.
- Reopen finding appears on anything you dismissed or marked fixed. It returns the finding to your open work.
- A finding CloudThinker verified as fixed can only be reopened by a scan that proves it’s back.
Share a single finding
In More actions, Copy finding copies it as text for a ticket or chat, and Download PDF saves it with its saved screenshots. To share several findings in one document, use the app’s Reports link. See Create Cyber reports.Troubleshooting
For every Cyber problem in one place, see Cyber troubleshooting.A card won't drop on a column
A card won't drop on a column
Read the reason the board shows. Dismissed never accepts a drag because a dismissal needs a reason. Needs verification only takes back its own cards. A fix proved by a scan only moves when a scan reopens it.
I can't triage, dismiss, or reopen anything
I can't triage, dismiss, or reopen anything
You have the Viewer role. Ask a workspace admin for the Developer role. You can still copy and download findings.
I dismissed a finding by mistake
I dismissed a finding by mistake
Open it and click Reopen finding, or drag its card from Dismissed onto a work column. CloudThinker includes it in scans again.
A fixed finding came back
A fixed finding came back
A later scan proved the problem again. Open the app’s Runs link to see which run reopened it, then open the finding for the new evidence.
Awaiting retest never clears
Awaiting retest never clears
Flagging doesn’t start a scan. Click Run pentest in the app header, or check that a schedule is enabled in Settings. A schedule can’t recheck a finding behind the login unless the app has a Long-lived token test user, so run those manually.
Next steps
Create Cyber reports
Export selected findings or download a run’s full report
Run a pentest
Run or schedule the scans that verify your fixes