

What you can change
Go to Settings → Agents. The sidebar lists your workspace’s Custom agents; the built-in assistant has no settings entry. Click an agent to open its two tabs, Identity and Connections.Customizing agents requires the workspace Admin role. Developers and Viewers can chat with agents but can’t edit them.
Plan tiers
The number of custom agents depends on your plan.
Hit the limit? Delete an unused agent or upgrade your plan.
Create a custom agent
Need an agent with your team’s rules built in — a billing analyst, an on-call summarizer, a documentation specialist? Build your own. Go to Settings → Agents, click Create agent, then choose Create with AI or Build with form.- Create with AI
- Build with form
Best when you know what the agent should do but don’t want to fill every field yourself.Describe what you want in one sentence — CloudThinker takes it from there. It typically confirms:
- Name and @mention — suggests options based on your description.
- Role and Goal — drafts both for you to approve or tweak.
- Model Tier — recommends Light / Pro / Ultra based on task complexity.
- Instructions — generates a first draft you can refine.
- Connections — asks which to attach (cloud, database, Kubernetes, or MCP — an open standard for plugging in external tools).
- Skill Learning — whether the agent saves new skills (reusable know-how it picks up from your work) automatically (Auto), asks first (Offer), or never (Off).
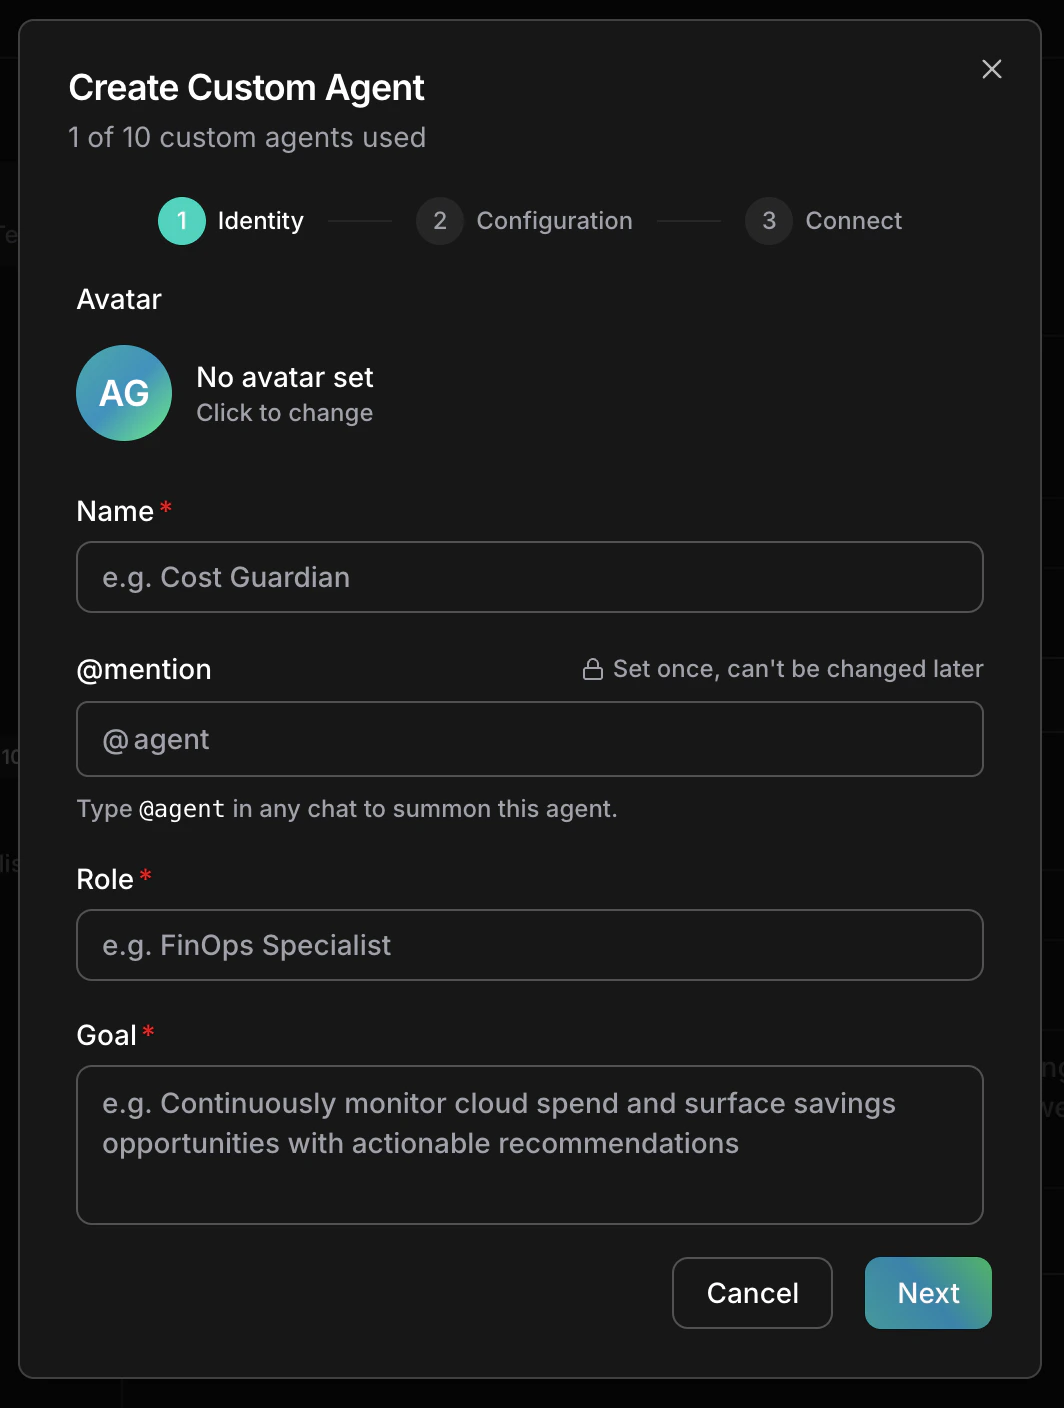
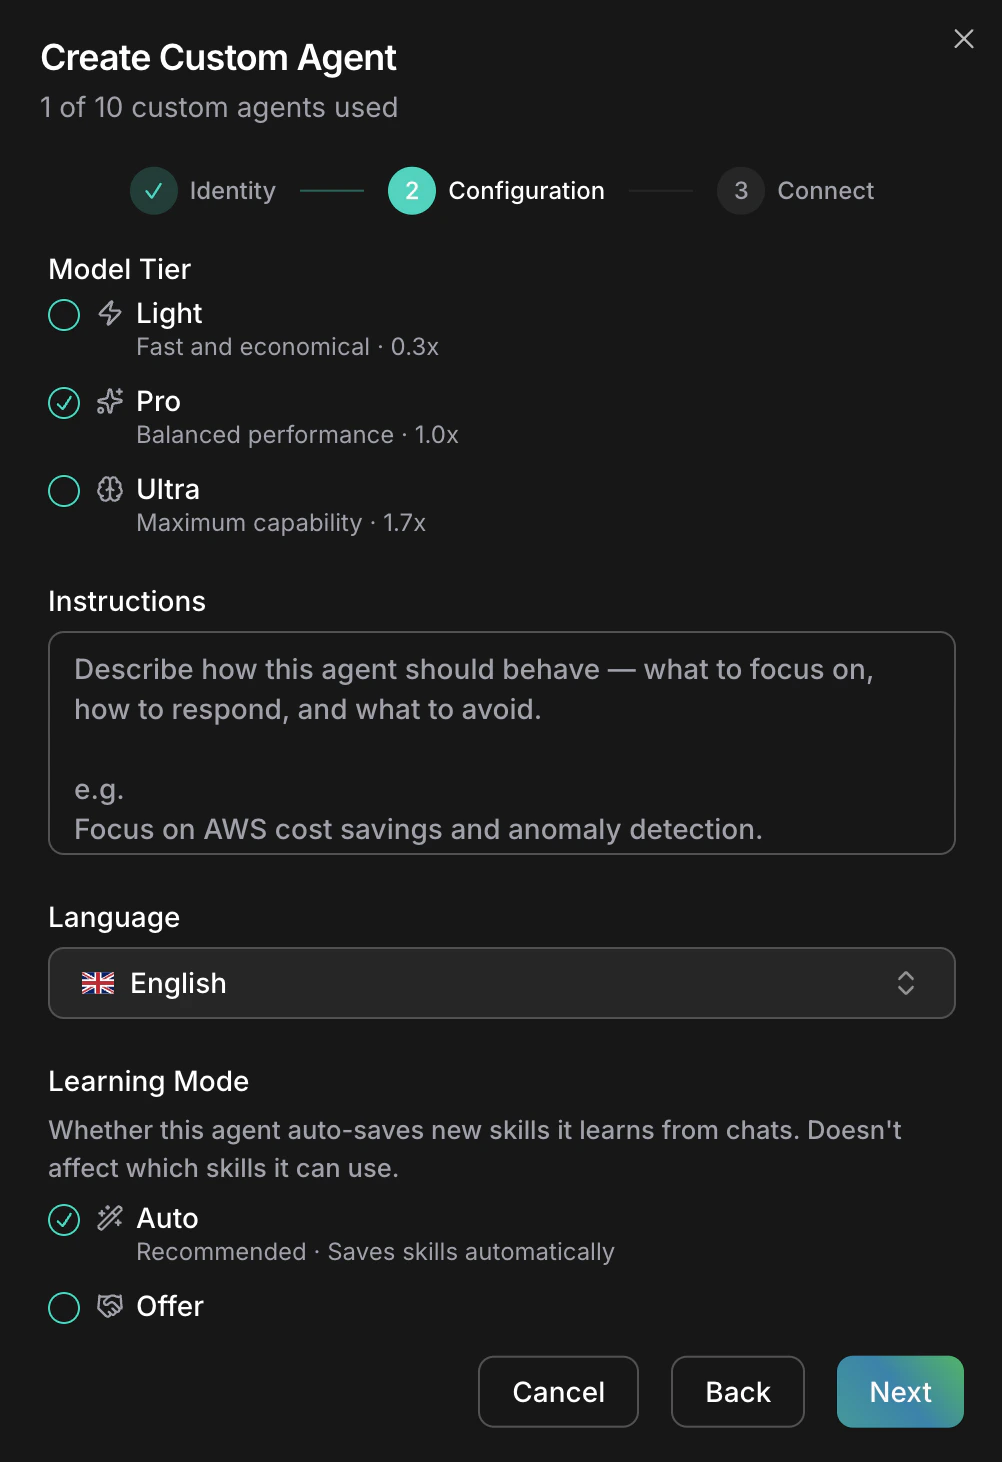
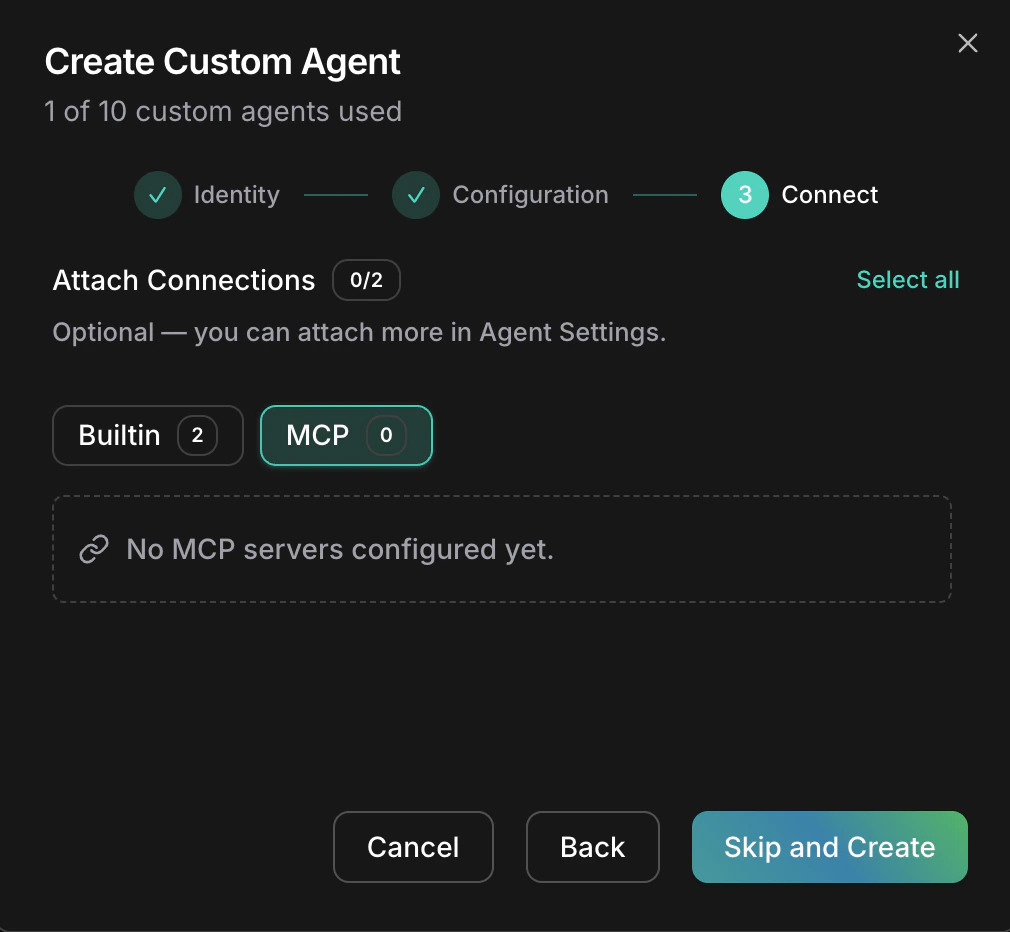
Attach connections
Connections are how a custom agent reaches your cloud, databases, Kubernetes, or MCP servers. You decide what each agent can touch. Every agent has the same set of builtin tools — there is no per-agent tool toggle, so scope an agent by choosing its connections. An agent accepts up to 64 connections.1
Open the Connections tab
From the agent dialog, click Connections. The header shows the count (e.g. “3 connections”).
2
Pick Builtin or MCP
Use the sub-tabs to switch between Builtin (cloud, database, Kubernetes) and MCP.
3
Add or remove
Click Add to attach, Remove to detach. Save to apply.
Examples
Good instructions cover three areas: role context (expertise for your environment), scope limits (what the agent should and shouldn’t touch), and operational guidelines (procedures and escalation paths). For example:
Things to know
- Edits apply on the next message — in-flight chats finish under the old settings.
- Pick a custom agent’s @mention carefully — it’s set once and you’ll be living with it.
- Custom agents act under your workspace’s autonomy mode — Manual or Auto. See Approval mode.
Next steps
Set up connections
Wire up cloud, database, Kubernetes, and MCP connections
Agents
How CloudThinker, subagents, and custom agents share the work
Custom skills
Add domain knowledge to any agent
Commands
Save reusable prompts and run them with /